Tutorial
Connecting to Proton Manager for the First Time
Section titled “Connecting to Proton Manager for the First Time”Congratulations on getting setup and ready to go with BCMS and Proton. While Proton was designed to be easy to setup and use, this section can help answer questions that may come up when using Proton the first time. This section focuses on getting started with the Proton features in the Browsium Client Manager, including finding the server URL, creating user accounts, and other basic elements on the administrative side of the system.
Connecting to the Proton Manager
Section titled “Connecting to the Proton Manager”Accessing the administrative console and reporting screens of the Proton Manager is easy. All you need is a modern browser (latest Internet Explorer, Edge Chrome, or Firefox recommended), the BCMS URL (configured during setup) and lastly, network access to your BCMS (Proton) Server to access your server data.
During installation, an Internet shortcut (.lnk file) is created on the server to enable easy access to the Browsium Client Manager and Proton features on your server. This shortcut connects to Browsium Client Manager while setting the managed BCMS to the one for your organization. To access the Browsium Client Manager from other systems, or to provide access to other administrators, simply provide the shortcut .lnk file.
While .lnk files are very helpful when accessing a web server with a complex URL, email systems typically block these files. Therefore, sharing them with other administrators of your Proton Server can be difficult. The following paragraph provides an alternative for sharing this URL.
Another option for sharing the Proton Manager URL with other administrators is to provide the shortcut URL itself rather than the .lnk file. The URL is:
where SERVERNAME is the machine name (or Fully Qualified Domain Name) of the Windows system where you installed Proton and PORT is 443 for a default BCMS installation. If you are using port 443, you can leave PORT blank as 443 is the default port for all HTTPS traffic.
SERVERNAME and PORT are referenced in the following sections using the same definitions used above.
Self-Signed Certificate Errors
Section titled “Self-Signed Certificate Errors”It is possible to install BCMS using a self-signed certificate used to encrypt communication to and from the server. If a self-signed certificate was chosen during setup, you may require a few extra steps to ensure proper client connectivity.
During the secure connection process with Browsium Client Manager may trigger certain browser error notifications if the Proton Server was installed with a self-signed certificate and the Manager is being accessed from a system not running Proton Server.
Browsium recommends the use of certificates signed by only known and trusted certificate authorities.
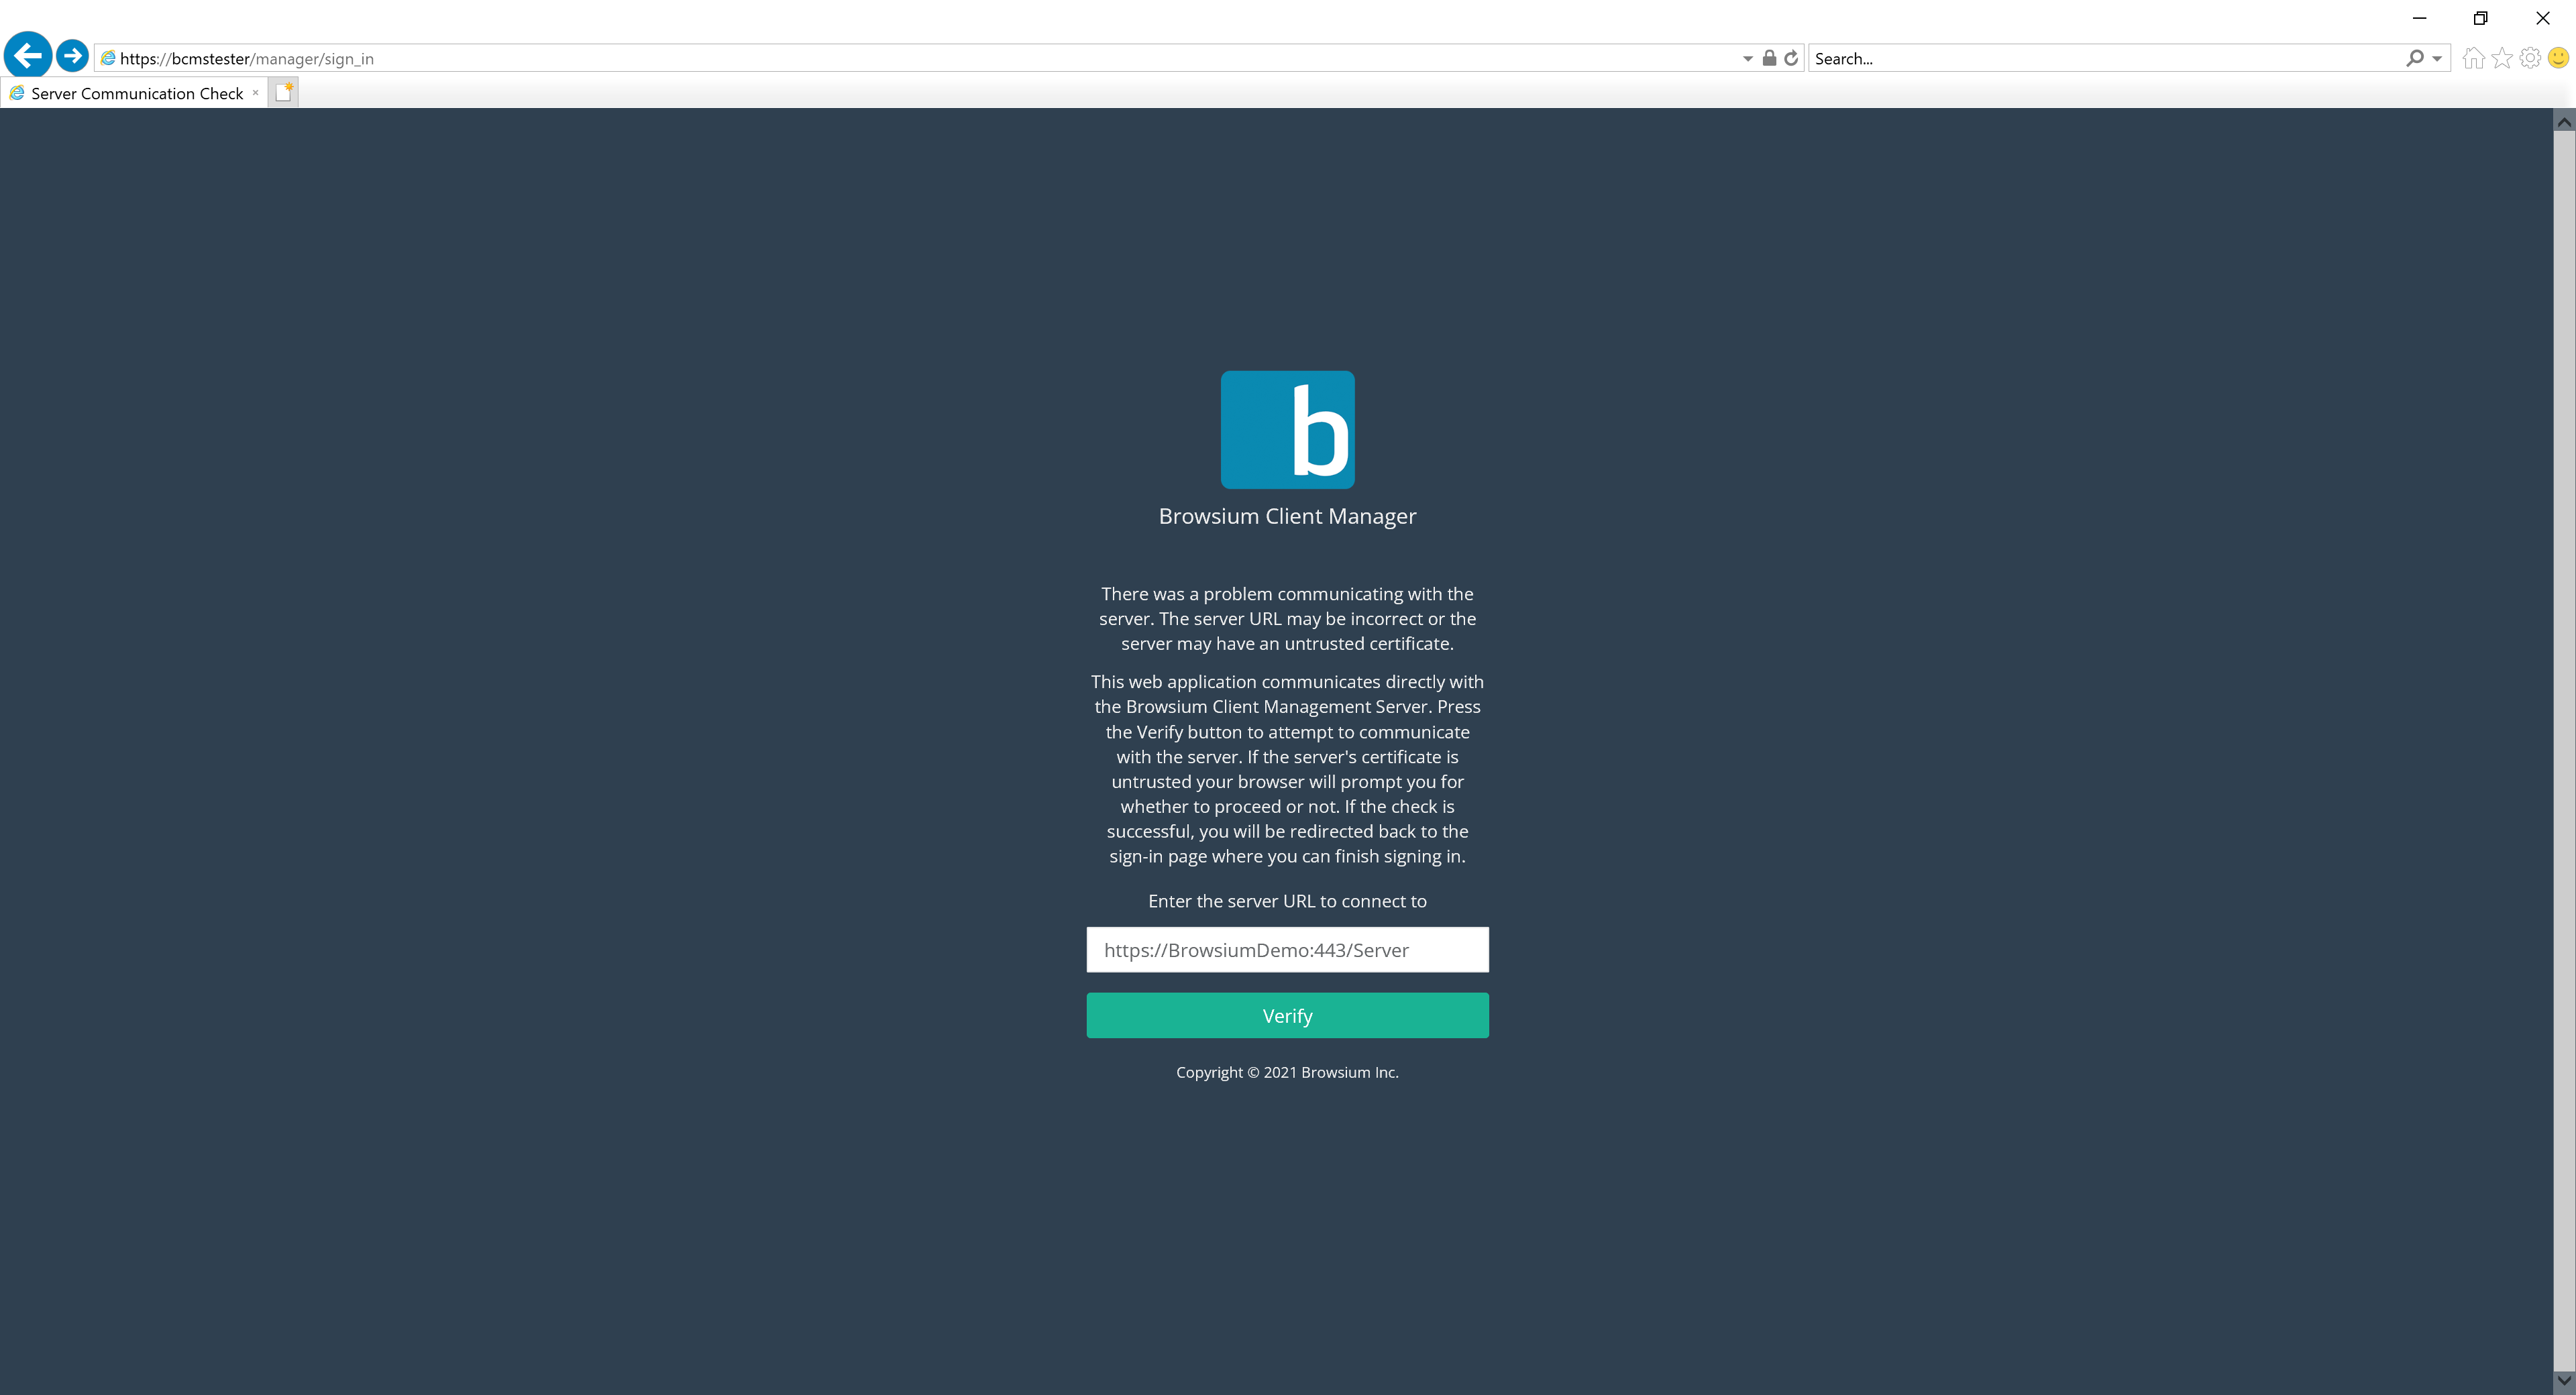
The following error message is generated by the Browsium Client Manager to validate the secure connection to the Proton Server when the Proton Server is using a self-signed certificate. Click ‘Verify’ to complete the validation and then log into the Proton Manager.
 {width=“2.2174114173228348in” height=“3.79715769903762in”}
Other certificate errors you may experience only impact connections to the Browsium Client Manager. The errors can be safely bypassed without creating any security exposure or risk to the organization once the certificate details have been verified as indicated below.
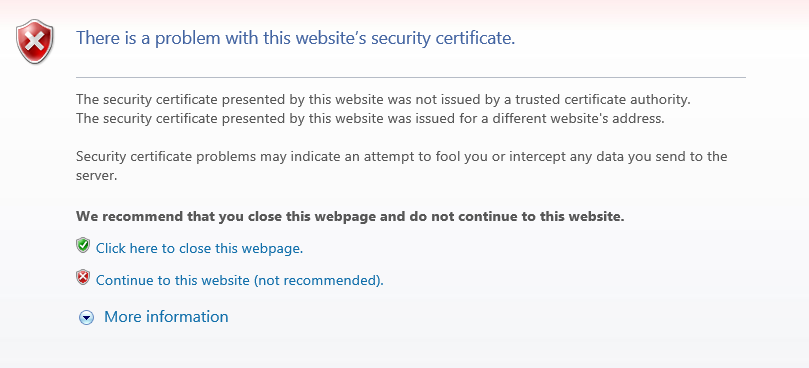
Internet Explorer users may see this certificate error if the certificate is self-signed:
 {width=“5.304771434820648in” height=“2.4132174103237096in”}
Click the ‘More Information’ link to verify the URL (IP address or name), then click ‘Continue to this website’ if the details are correct.
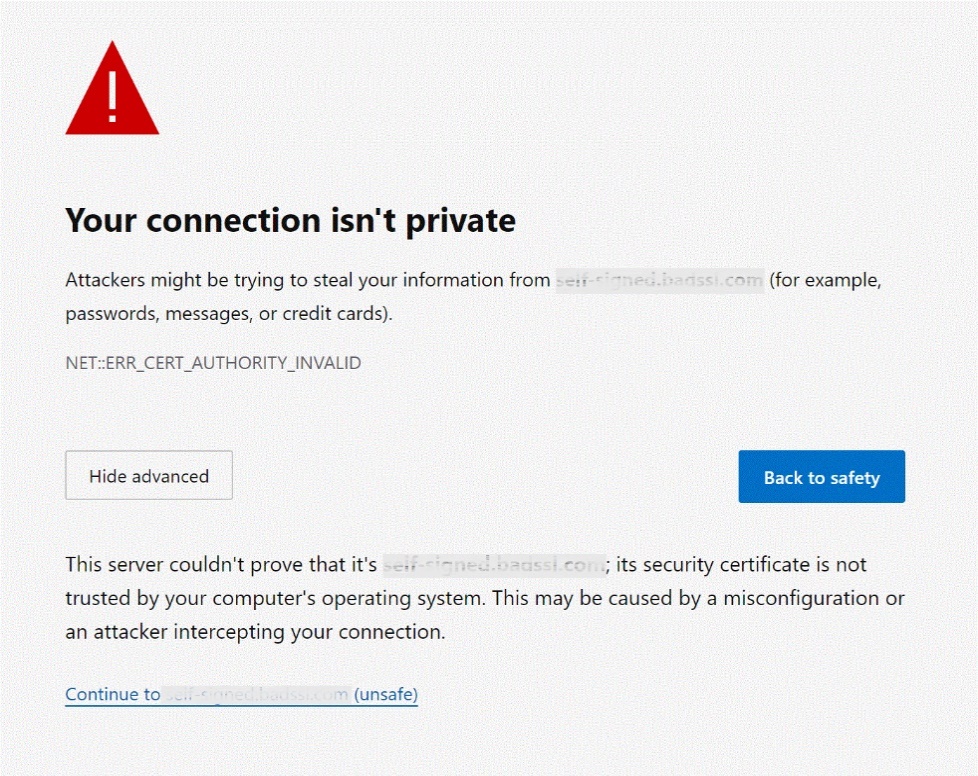
When viewed with Google Chrome or Microsoft Edge (Chromium), the certificate error screen looks like this:
 {width=“4.4492016622922135in” height=“3.5260870516185476in”}
Verify the URL (IP address or name) is the right location, then click the ‘Continue’ link to proceed.
Users should only see these certificate errors once for each browsing session when connecting to the BCMS Manager.
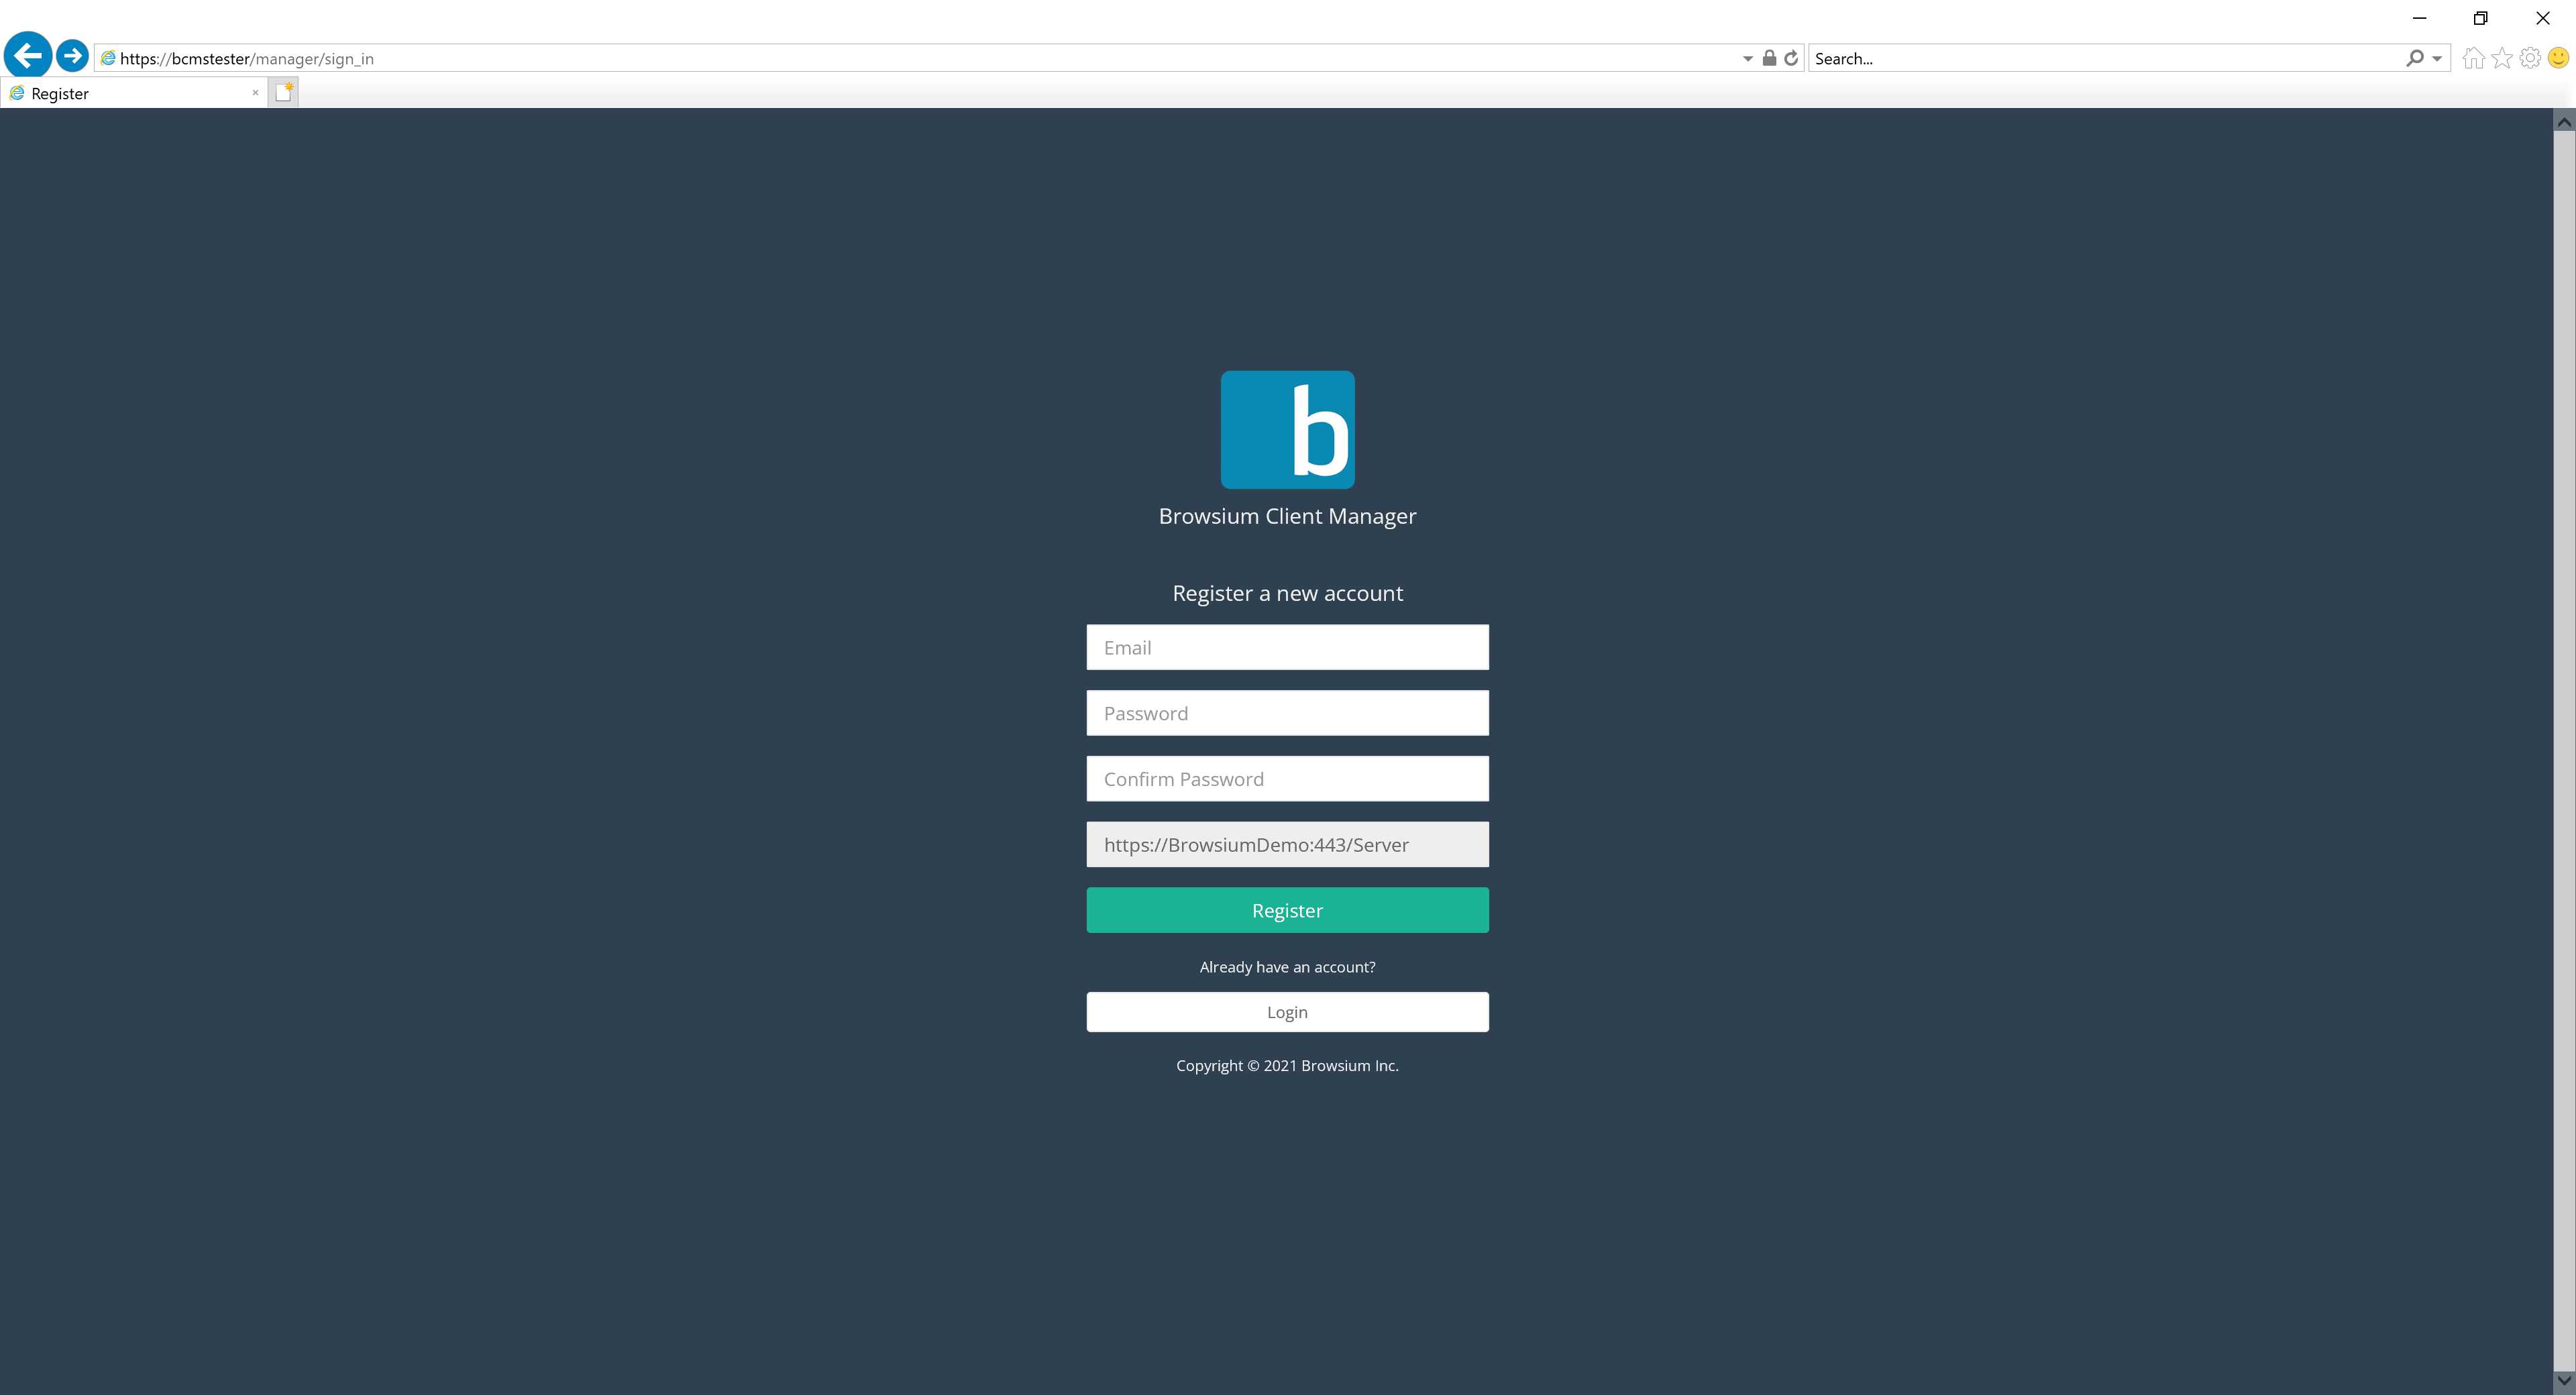
Creating the First Account
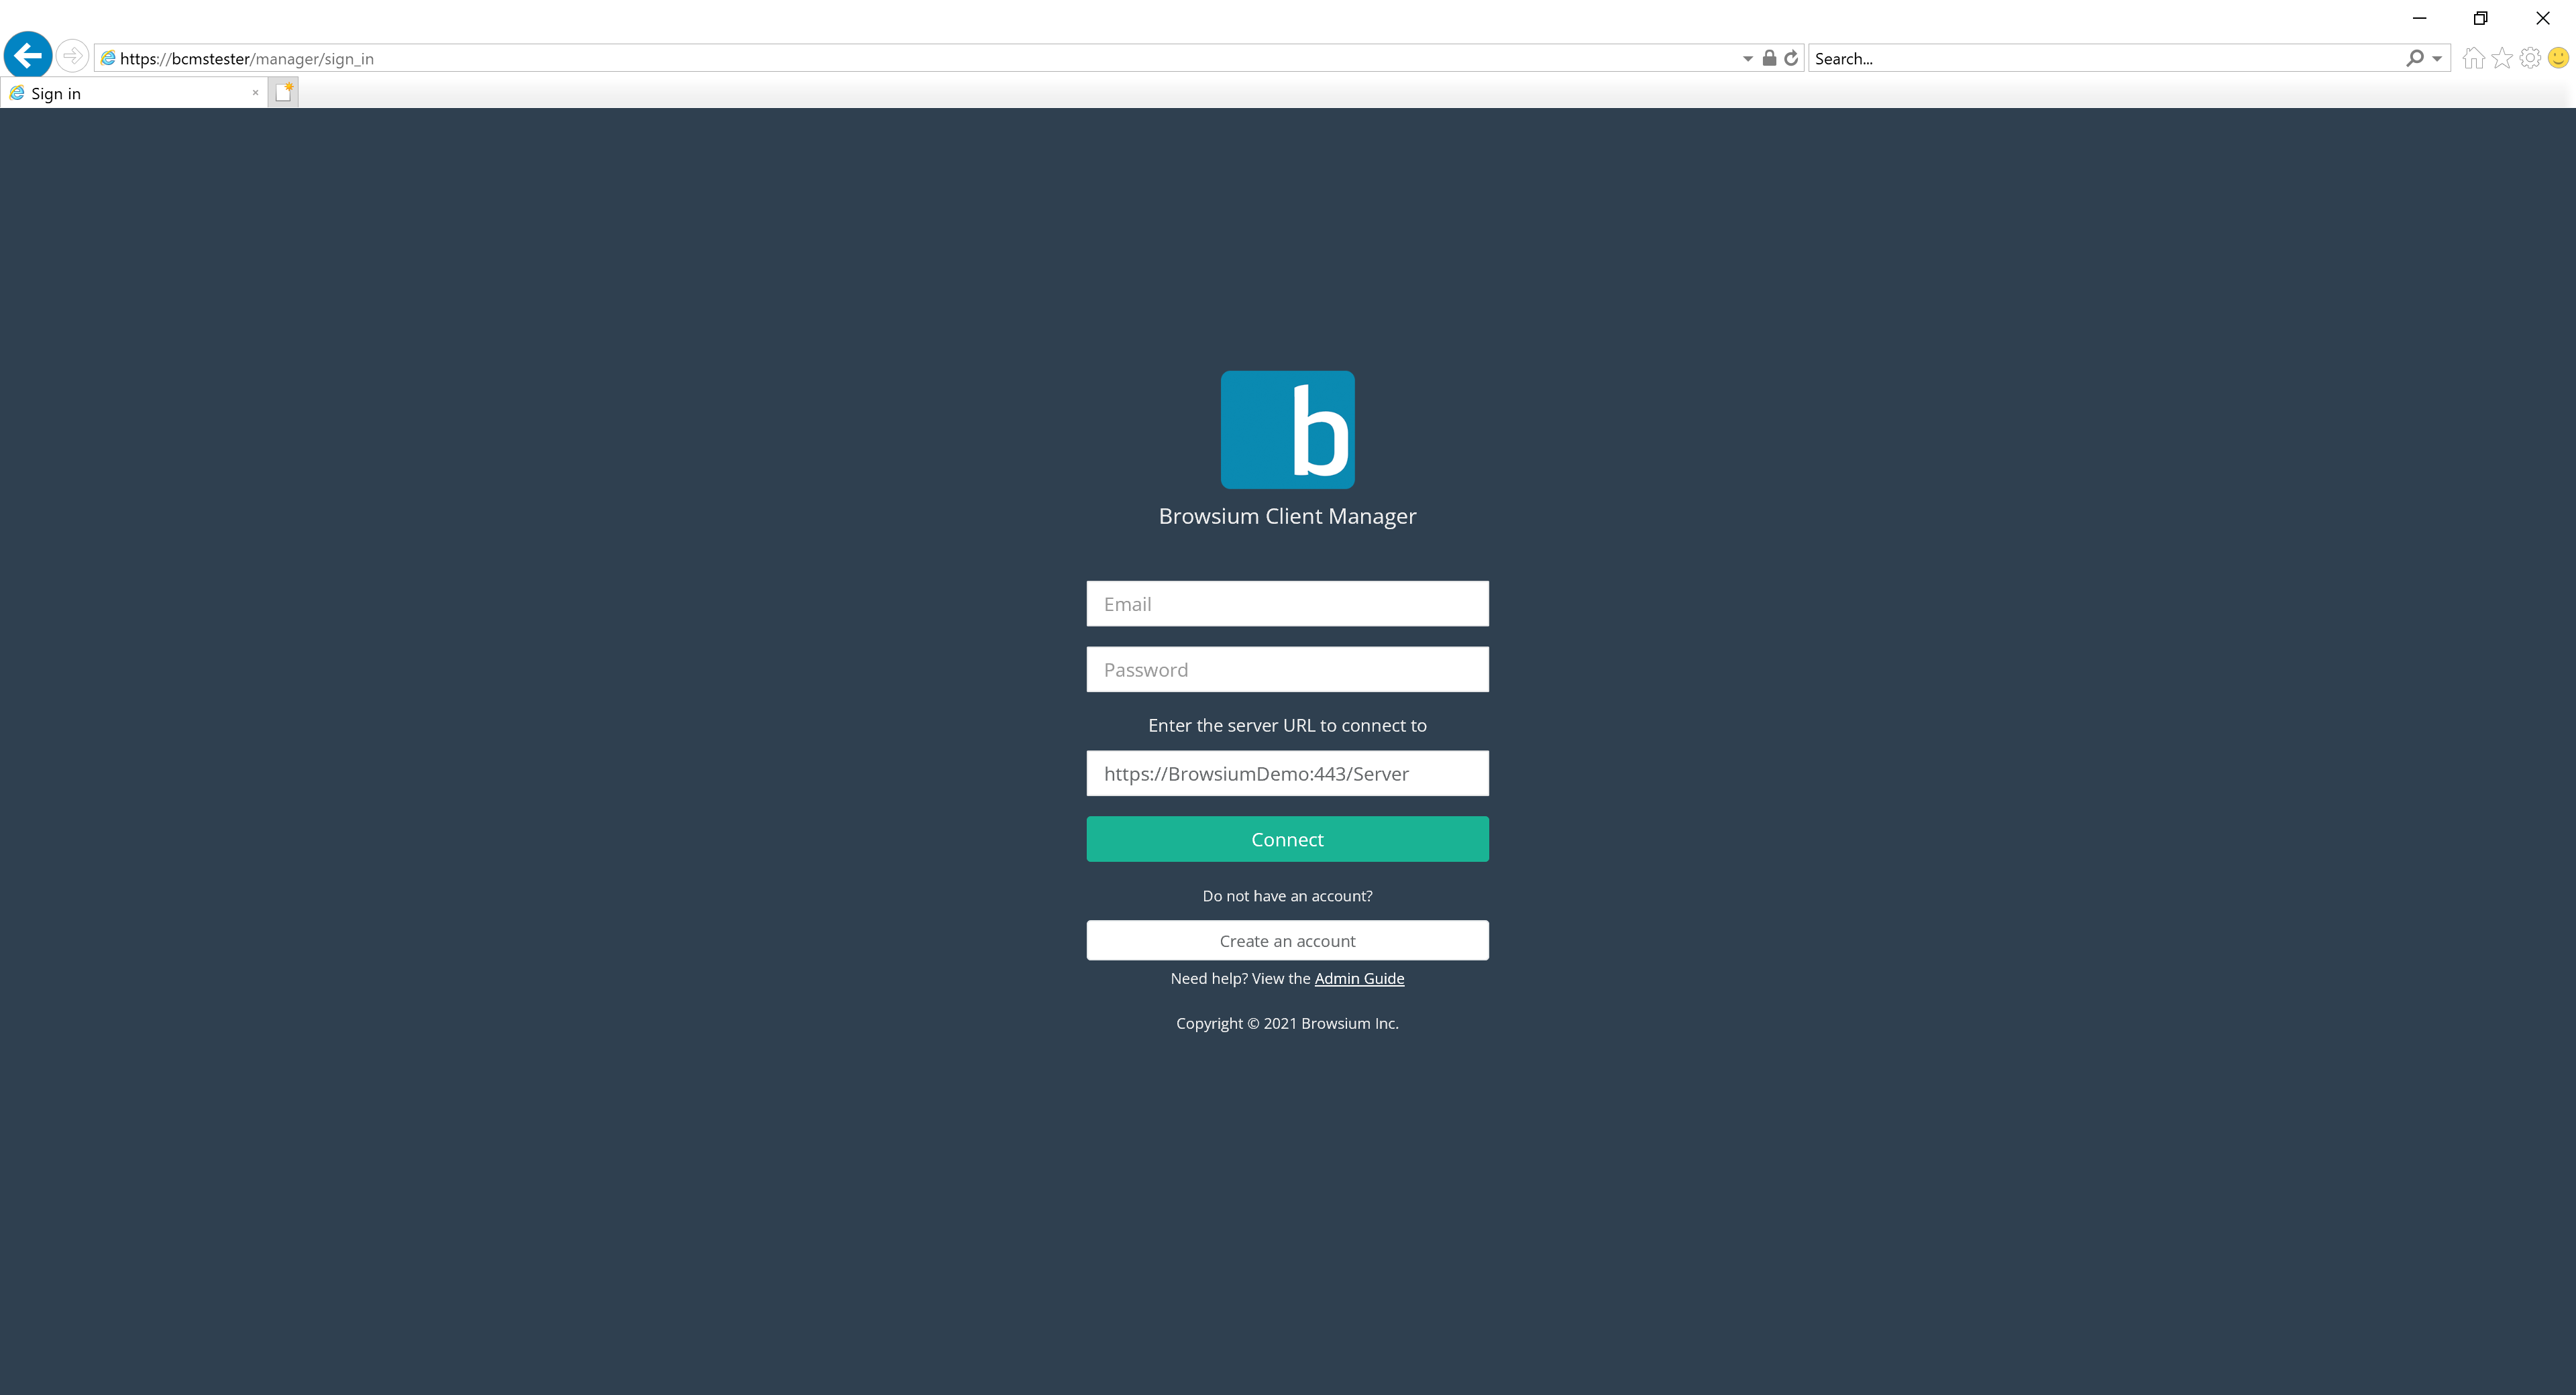
Section titled “Creating the First Account”Once connected to Browsium Client Manager, user accounts are required for access control. Administrator, Power User, and Standard User account types are available. The first account created will be an Administrator. Select the ‘Create an account’ button the first time you access Browsium Client Manager.
Browsium Client Manager accounts are stored in Proton database but local and SSO authentication is supported. See the ‘Configuring Single Sign On’ section of the Browsium Client Management Server Administration Guide for more information on SSO configuration.
 {width=“2.501487314085739in” height=“3.6644094488188976in”}
Because BCMS are integrated, and BCMS must be setup first, the first account may have already been created.
Then create a username and password, using a well-formed email address for the username and a strong password. Then select Register.
 {width=“2.065923009623797in” height=“3.350713035870516in”}
The default Proton password policy enforces a minimum of 8 characters, including 1 special character. Supported special characters are
] [ ? / < ~ # ` ! @ $ % ^ & * ( ) + = } | : ” ; ’ , > {
To change the defaults and enforce stricter password policies, including account lockout and password expiration, see Password Policy Management in the Users Page section.
Once your account is created, you’ll be able to log in directly with the credentials you created.
 {width=“2.3496981627296587in” height=“2.425845363079615in”}
Additional accounts can be created using this same screen and permission levels are managed on the Users page in Proton Manager.
Exporting Proton Report Data Views
Section titled “Exporting Proton Report Data Views”The data and insights Proton can provide an organization have a broad set of uses and value to numerous teams. To enable easier sharing or integration of the data sets into other applications and existing internal reports, Proton offers several export options of the currently active view:
-
Copy to Clipboard
-
Save as CSV
-
Print
Any of these export options can be accessed by clicking the Page Export button in the Export Bar interface to the right of the Search box.
{width=“1.6159722222222221in” height=“1.1354166666666667in”}
{width=“4.479166666666667in” height=“0.4791666666666667in”}
You may also export the entire dataset for the current report to CSV only using the Full Export button.
Exported data will be in the same layout and format as the on-screen report. Column headers, ordering and labeling is preserved in the export. CSV exported data contain a header row defining the columns. The Copy (to clipboard) option contains all text, but formatting is lost due to limitations of the copy/paste process.
The Export View feature is available on any of the Client, Activity and Rules pages.
Creating Rules
Section titled “Creating Rules”Once Browsium Proton has been activated on your server, and you’ve installed Browsium Client on a few client PCs (configured to communicate with your BCMS via the ConfigurationServerURL registry key), you can begin creating rules. Rules serve two functions:
-
Map rules govern web application mappings to make it easier to combine and track accesses to specific web applications.
-
Ignore rules allow you to choose sites to ignore, so they don’t appear in activity reports and are no longer sent from Proton Clients to the Proton Server.
Create and Test a Map Rule
Section titled “Create and Test a Map Rule”Map rules are very useful if you have web applications that have complex or non-obvious URLs. Map rules allow you to create a friendly name for those URLs so they’re much easier to read and analyze in Proton’s activity reports.
For this example, we have identified a website, yourang.us, which has a number of web applications, each performing a different function. YouRang also has a few web applications that use non-continuous URLs — that is, the same application has a few unique URLs (/order_phone.htm and /purchase_phone.htm) that cannot be easily string-matched to aggregate them into a single view of usage of that application. Map rules will be very helpful in turning a variety of end user accesses of this section of the YouRang website into meaningful information.
To create the map rules needed for the YouRang phone ordering application, use the following steps:
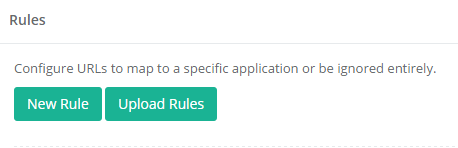
-
Visit the Rules node of the Proton Manager
-
Select ‘New Rule’ to create a new rule.
 {width=“4.044919072615923in” height=“1.30709208223972in”}
 -
The New Rule dialog pops up with its default values.
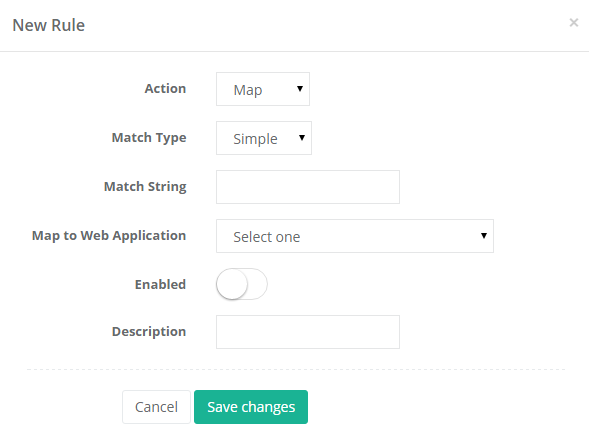 {width=“3.117209098862642in” height=“2.3551082677165356in”}
 -
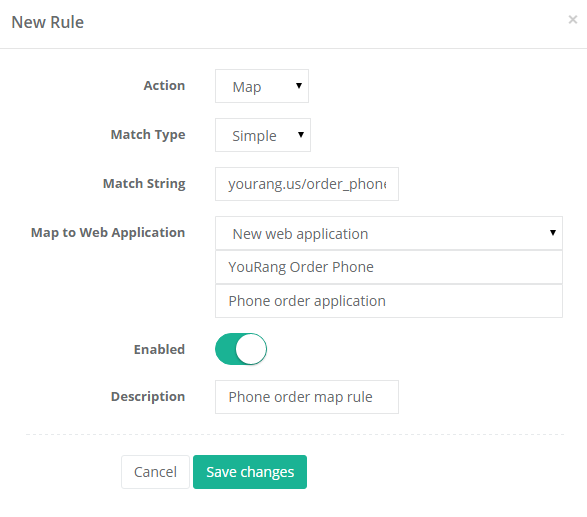
Keep the default values for Action: Map and Match Type: Simple, and enter “yourang.us/order_phone.htm” (without quotes) as the Match String. Then choose New web application for the Map to Web Application value and enter “YouRang Order Phone” with an appropriate description. Enable the rule and add a description for the rule.
 {width=“3.514555993000875in” height=“3.095444006999125in”}
 -
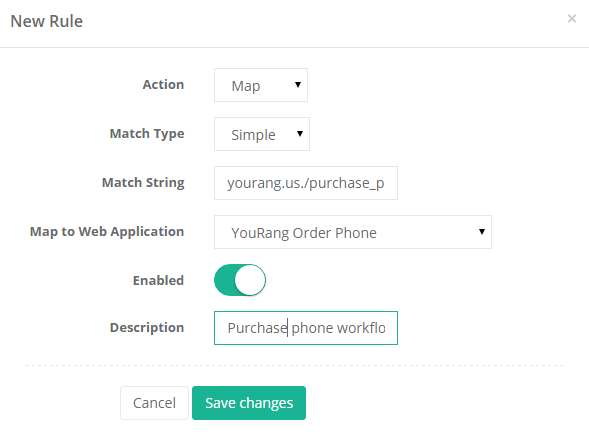
Next, repeat the steps above for the purchase_phone.php page, assigning it to the web application YouRang Order Phone created in the prior step.
 {width=“4.326681977252844in” height=“3.2541940069991253in”}
 -
We now have two map rules, aggregating all accesses to yourang.us/order_phone.htm and yourang.us/purchase_phone.php to a single web application called YouRang Order Phone.
 {width=“5.7282874015748035in” height=“0.9651192038495188in”}
 -
Viewing the Activity node and filtering the view to the Order Phone application shows us the aggregate results, at both the summary and detail level.
 {width=“5.580929571303587in” height=“0.9867672790901137in”}
Create and Test an Ignore Rule
Section titled “Create and Test an Ignore Rule”Ignore rules are very useful if you have users accessing websites that you don’t want to track in Proton (such as social media or e-commerce sites — though many organizations would love to know how much of that activity is happening during work hours). Another common scenario for ignore rules is to ignore accesses to the Browsium Client Manager as that traffic can dwarf accesses to other web applications if you’re accessing the Manager multiple times a day to view reports or monitor Proton tracking activity in your organization.
For this example, we will create an ignore rule for our Browsium Client Manager using the following steps:
-
First, let’s have a look at the traffic to a Browsium Client Manager (running at protondemo.browsium.com) without an ignore rule. We can do this by searching for the string ‘proton’ in the Activity page. We see a single access by 1 user.
 {width=“5.955780839895013in” height=“0.8660061242344707in”}
 -
Now let’s create some ignore rules. Select ‘New Rule’ to create a new rule.
{width=“4.0468821084864395in” height=“1.307726377952756in”} -
The New Rule dialog pops up with its default values.
{width=“3.9160258092738407in” height=“2.9586286089238847in”} -
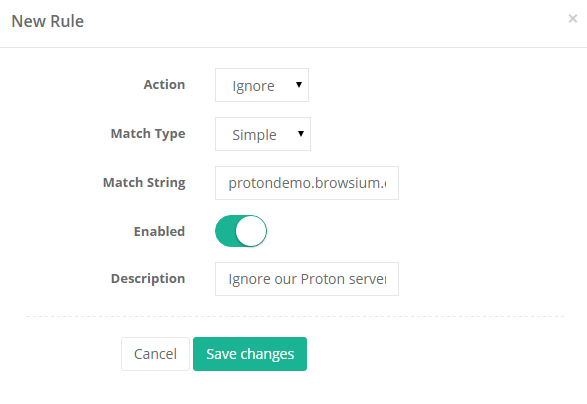
Next we’ll change the Action from the default Map to Ignore. We’ll leave Match Type as Simple. For the Match String, enter the server URL. For this example, we’ll use protondemo.browsium.com. We’ll set the rule to Enabled and give our rule a description.
 {width=“4.947773403324584in” height=“3.405282152230971in”}
 -
After saving changes, we visit our Activity node and again search for activity containing the text ‘proton’. No results are found, thanks to our ignore rule.
 {width=“6.027212379702537in” height=“0.847415791776028in”}
Ignore rules not only suppress activity from the Activity reports, but they also instruct Proton Clients to no longer send activity to the server that matches the ignore rule. It’s important to note that data already stored in the BCMS is not deleted by an ignore rule; it’s simply invisible to reports.
 {width=“0.9in” height=“0.9in”}
Appendix A
Appendix A: Troubleshooting
In this section you will learn:
-
How to recognize Issues with a Proton configuration
-
What to do when Proton is not working as expected