Tutorial
Connecting to BCMS Manager for the First Time
Section titled “Connecting to BCMS Manager for the First Time”Congratulations on getting setup and ready to go with BCMS. While BCMS was designed to be easy to setup and use, this section can help answer questions that may come up when using BCMS the first time. This section focuses on getting started with BCMS Manager, including finding the server URL, creating user accounts, and other basic elements on the administrative side of the system.
The BCMS Manager
Section titled “The BCMS Manager”The BCMS Manager web application is accessed by using the server name chosen during the installation. The default naming convention is https://SERVERNAME/manager, where SERVERNAME is the name of the server BCMS was installed on, or the name chosen during installation.
Connecting to the BCMS Manager
Section titled “Connecting to the BCMS Manager”Accessing the administrative console of the BCMS Manager is easy. All you need is a modern browser (latest Internet Explorer, Edge, Chrome, or Firefox recommended) and the BCMS Server URL (configured during setup).
During installation, an Internet shortcut (.lnk file) was created on the server to enable easy access to BCMS Manager for your server. This shortcut connects to BCMS Manager while setting the managed BCMS Server to the one for your organization.
The BCMS Manager application is designed to allow for connectivity to more than one BCMS Server. Most organizations will only require one BCMS server, but for those with complex structures, business configurations or security boundaries, a single BCMS manager can connect and manage all of them. More information on how to change which BCMS Server you are connected to can be found below.
To access the BCMS Manager from other systems, or to provide access to other administrators, simply provide the shortcut .lnk file.
While .lnk files are very helpful when accessing a web server with a complex URL, email systems typically block these files. Therefore, sharing them with other administrators of your BCMS Server can be difficult. The following paragraph provides an alternative for sharing this URL.
Another option for sharing the BCMS Manager URL with other administrators is to provide the shortcut URL itself rather than the .lnk file. The URL is:
where SERVERNAME is the machine name (or Fully Qualified Domain Name) of the Windows system where you installed BCMS. If you selected a custom port during installation, be sure to specify it following the SERVERNAME.
Self-Signed Certificate Errors
Section titled “Self-Signed Certificate Errors”BCMS requires SSL connectivity to both ensure security and privacy in connectivity and data transmission, as well as ensure Browsium helps companies follow best practices. During setup you were prompted to select either a self-signed certificate or use a CA issued certificate signed by known authorities.
If you selected to use a self-signed certificate or are using a certificate signed by an unknown CA, BCMS Manager may trigger certain browser error notifications. The installation process will automatically install self-signed certificates on the local system (server) if self-signed certificates were chosen during installation, so accessing to the BCMS Manager from that server will not generate these errors. For the best remote management experience and to avoid certificate errors, use a certificate signed by a known authority.
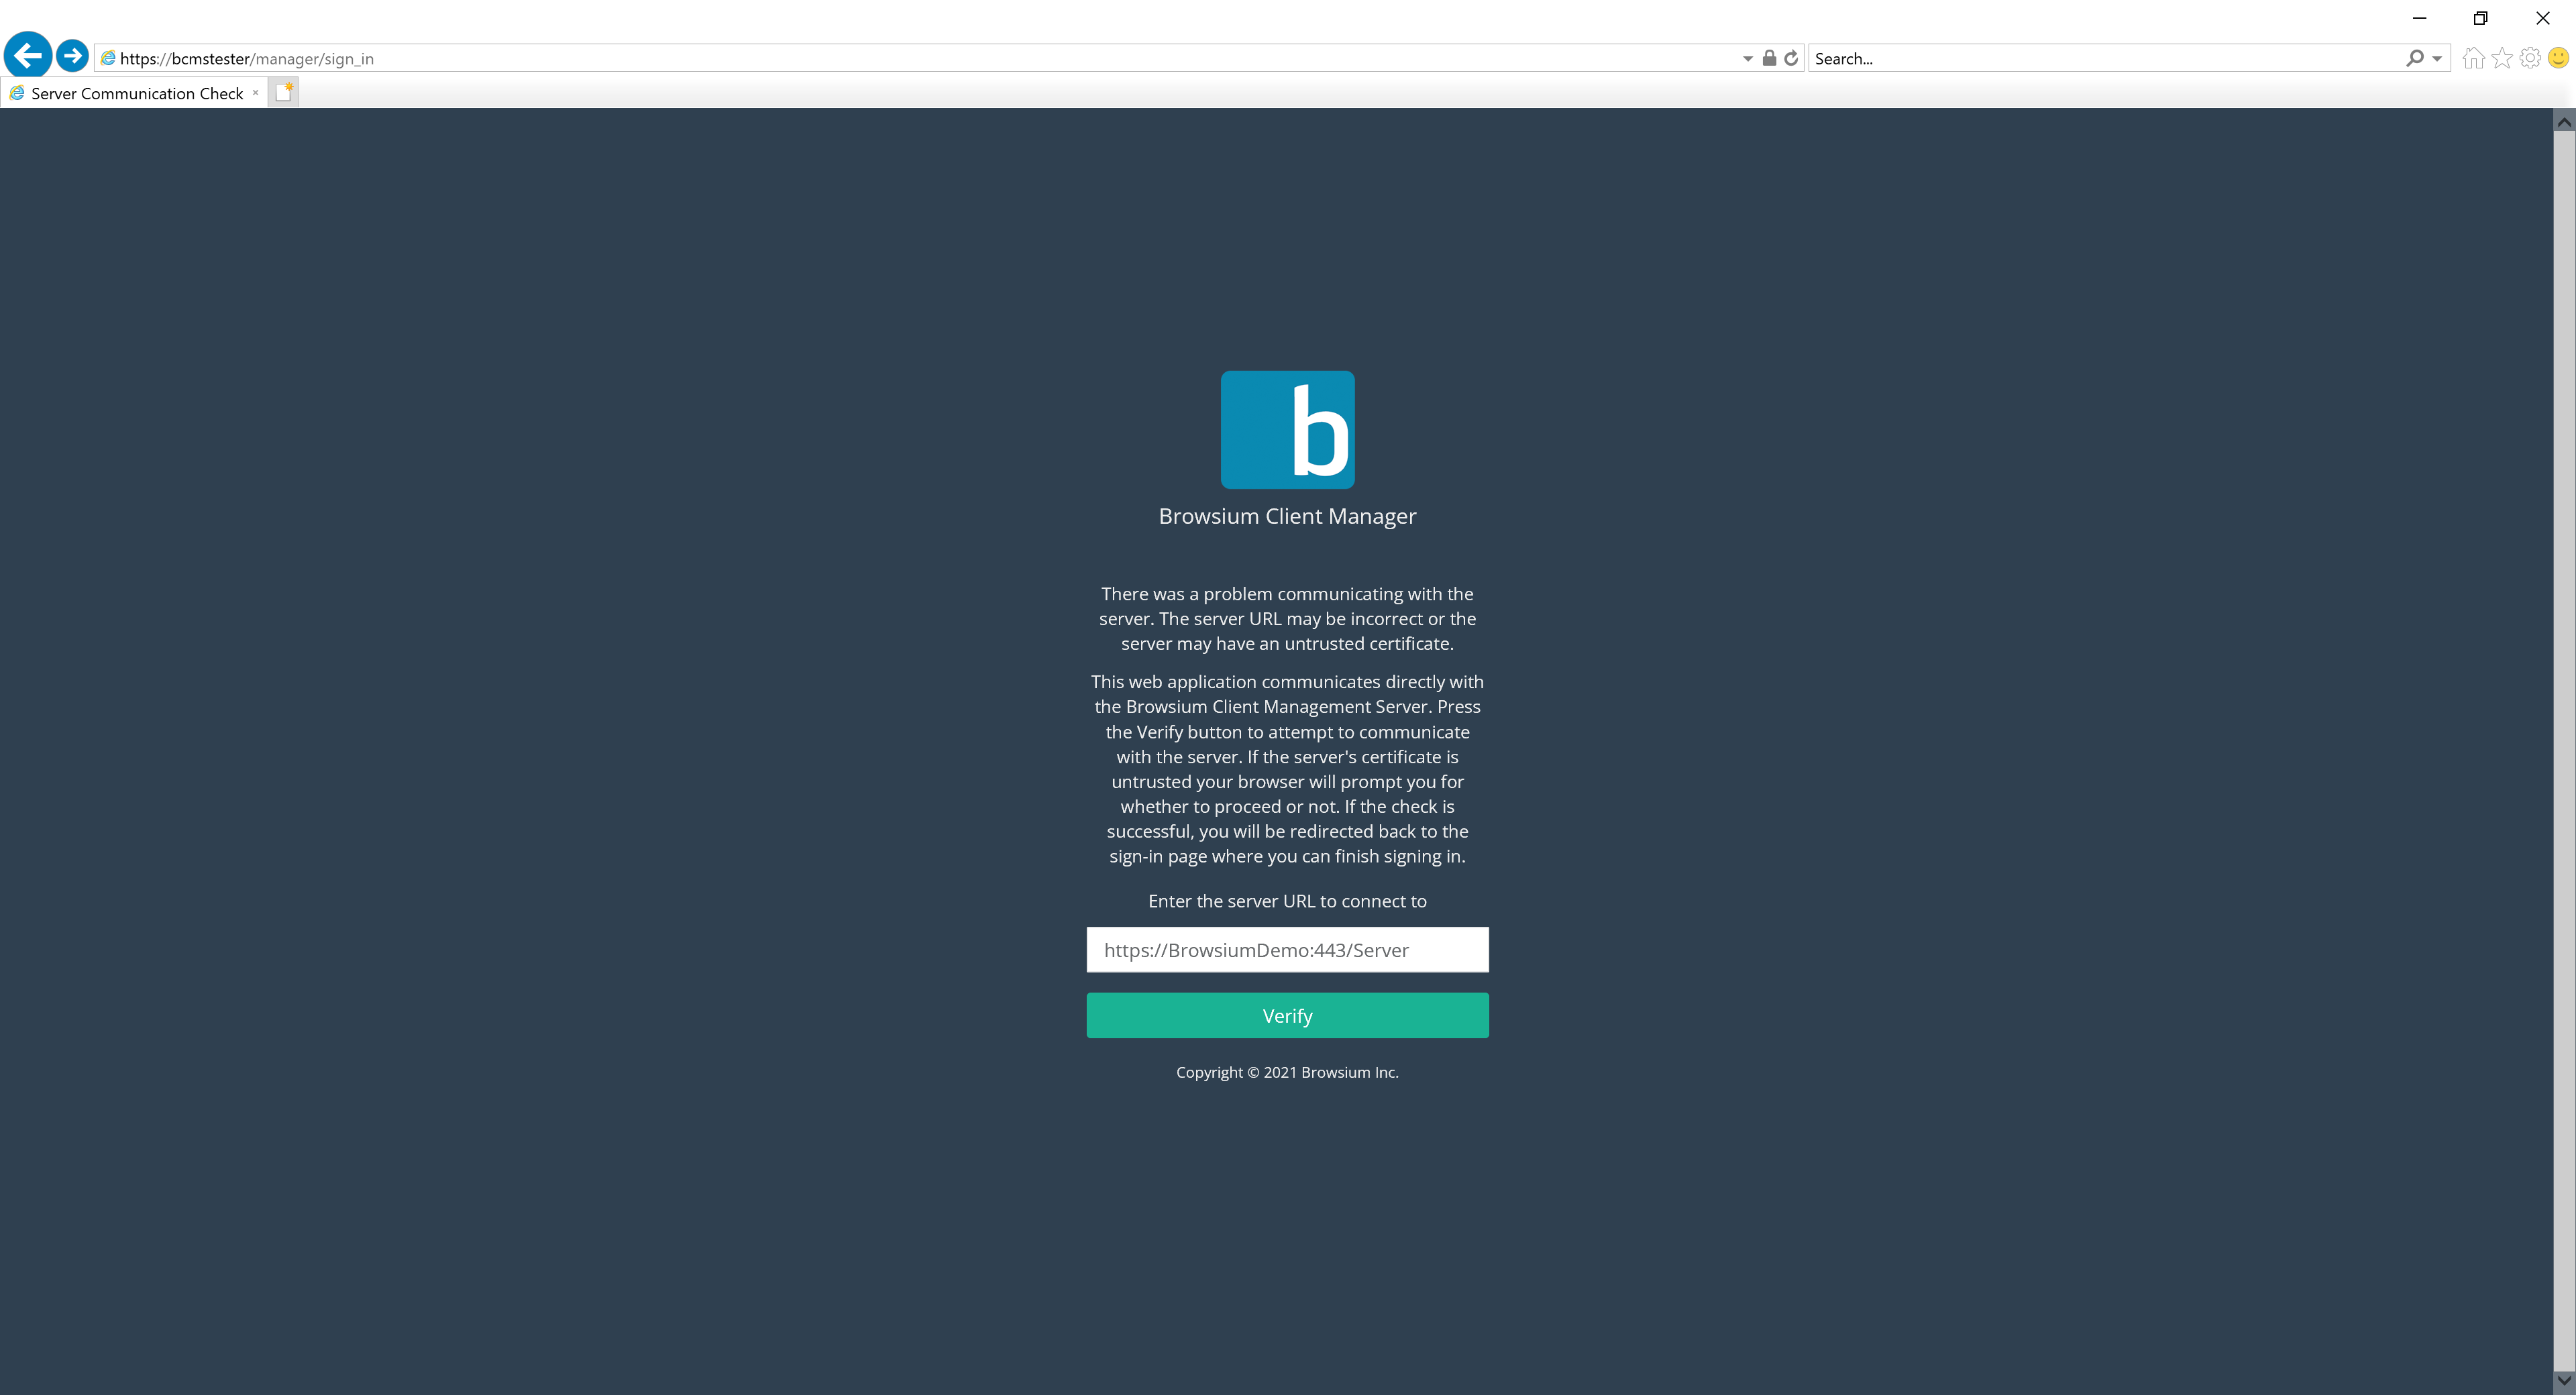
The following error message is generated by the BCMS Manager to validate the secure connection to the BCMS Server when the BCMS Server is using a self-signed certificate. Click ‘Verify’ to complete the validation and then log into the Proton Manager.
 {width=“2.2174114173228348in” height=“3.79715769903762in”}
Other certificate errors you may experience only impact connections to the BCMS Manager. The errors can be safely bypassed without creating any security exposure or risk to the organization once the certificate details have been verified as indicated below.
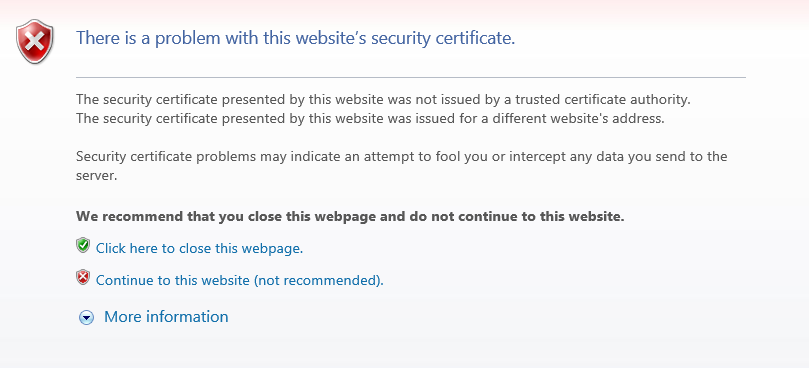
Internet Explorer users may see this certificate error if the certificate is self-signed:
 {width=“5.304771434820648in” height=“2.4132174103237096in”}
Click the ‘More Information’ link to verify the URL (IP address or name), then click ‘Continue to this website’ if the details are correct.
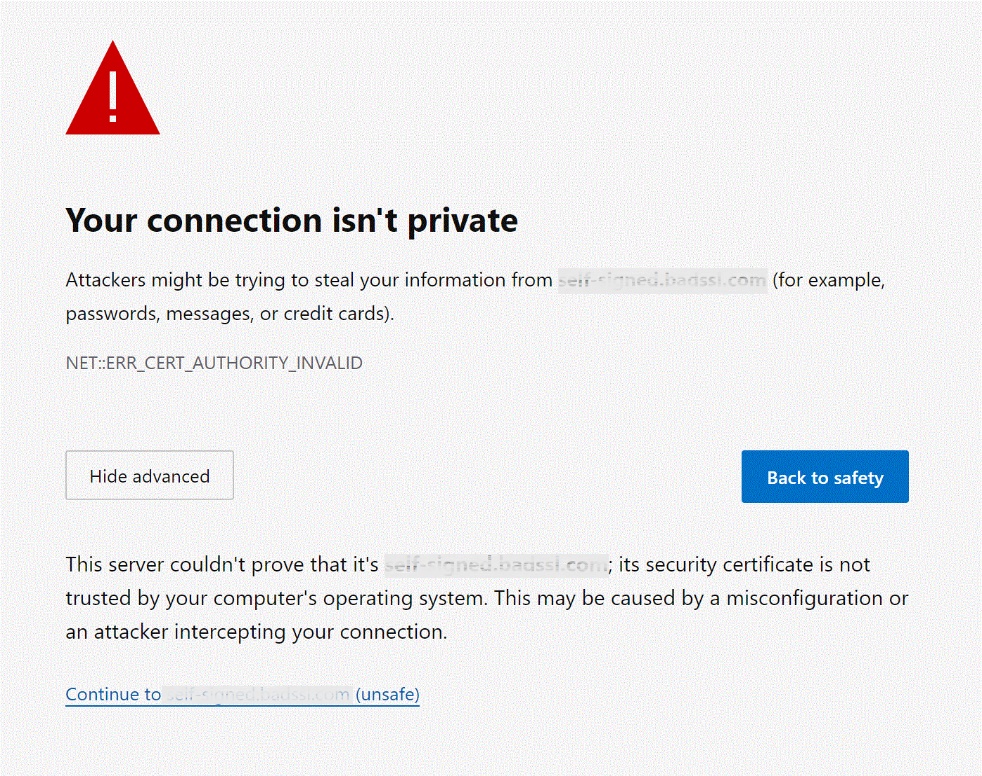
When viewed with Google Chrome or Microsoft Edge (Chromium), the certificate error screen looks like this:
 {width=“4.4492016622922135in” height=“3.5260870516185476in”}
Verify the URL (IP address or name) is the right location, then click the ‘Proceed’ link to continue.
Users should only see these certificate errors once for each browsing session when connecting to the BCMS Manager.
[]{#_Creating_the_First .anchor}
Creating the First Account
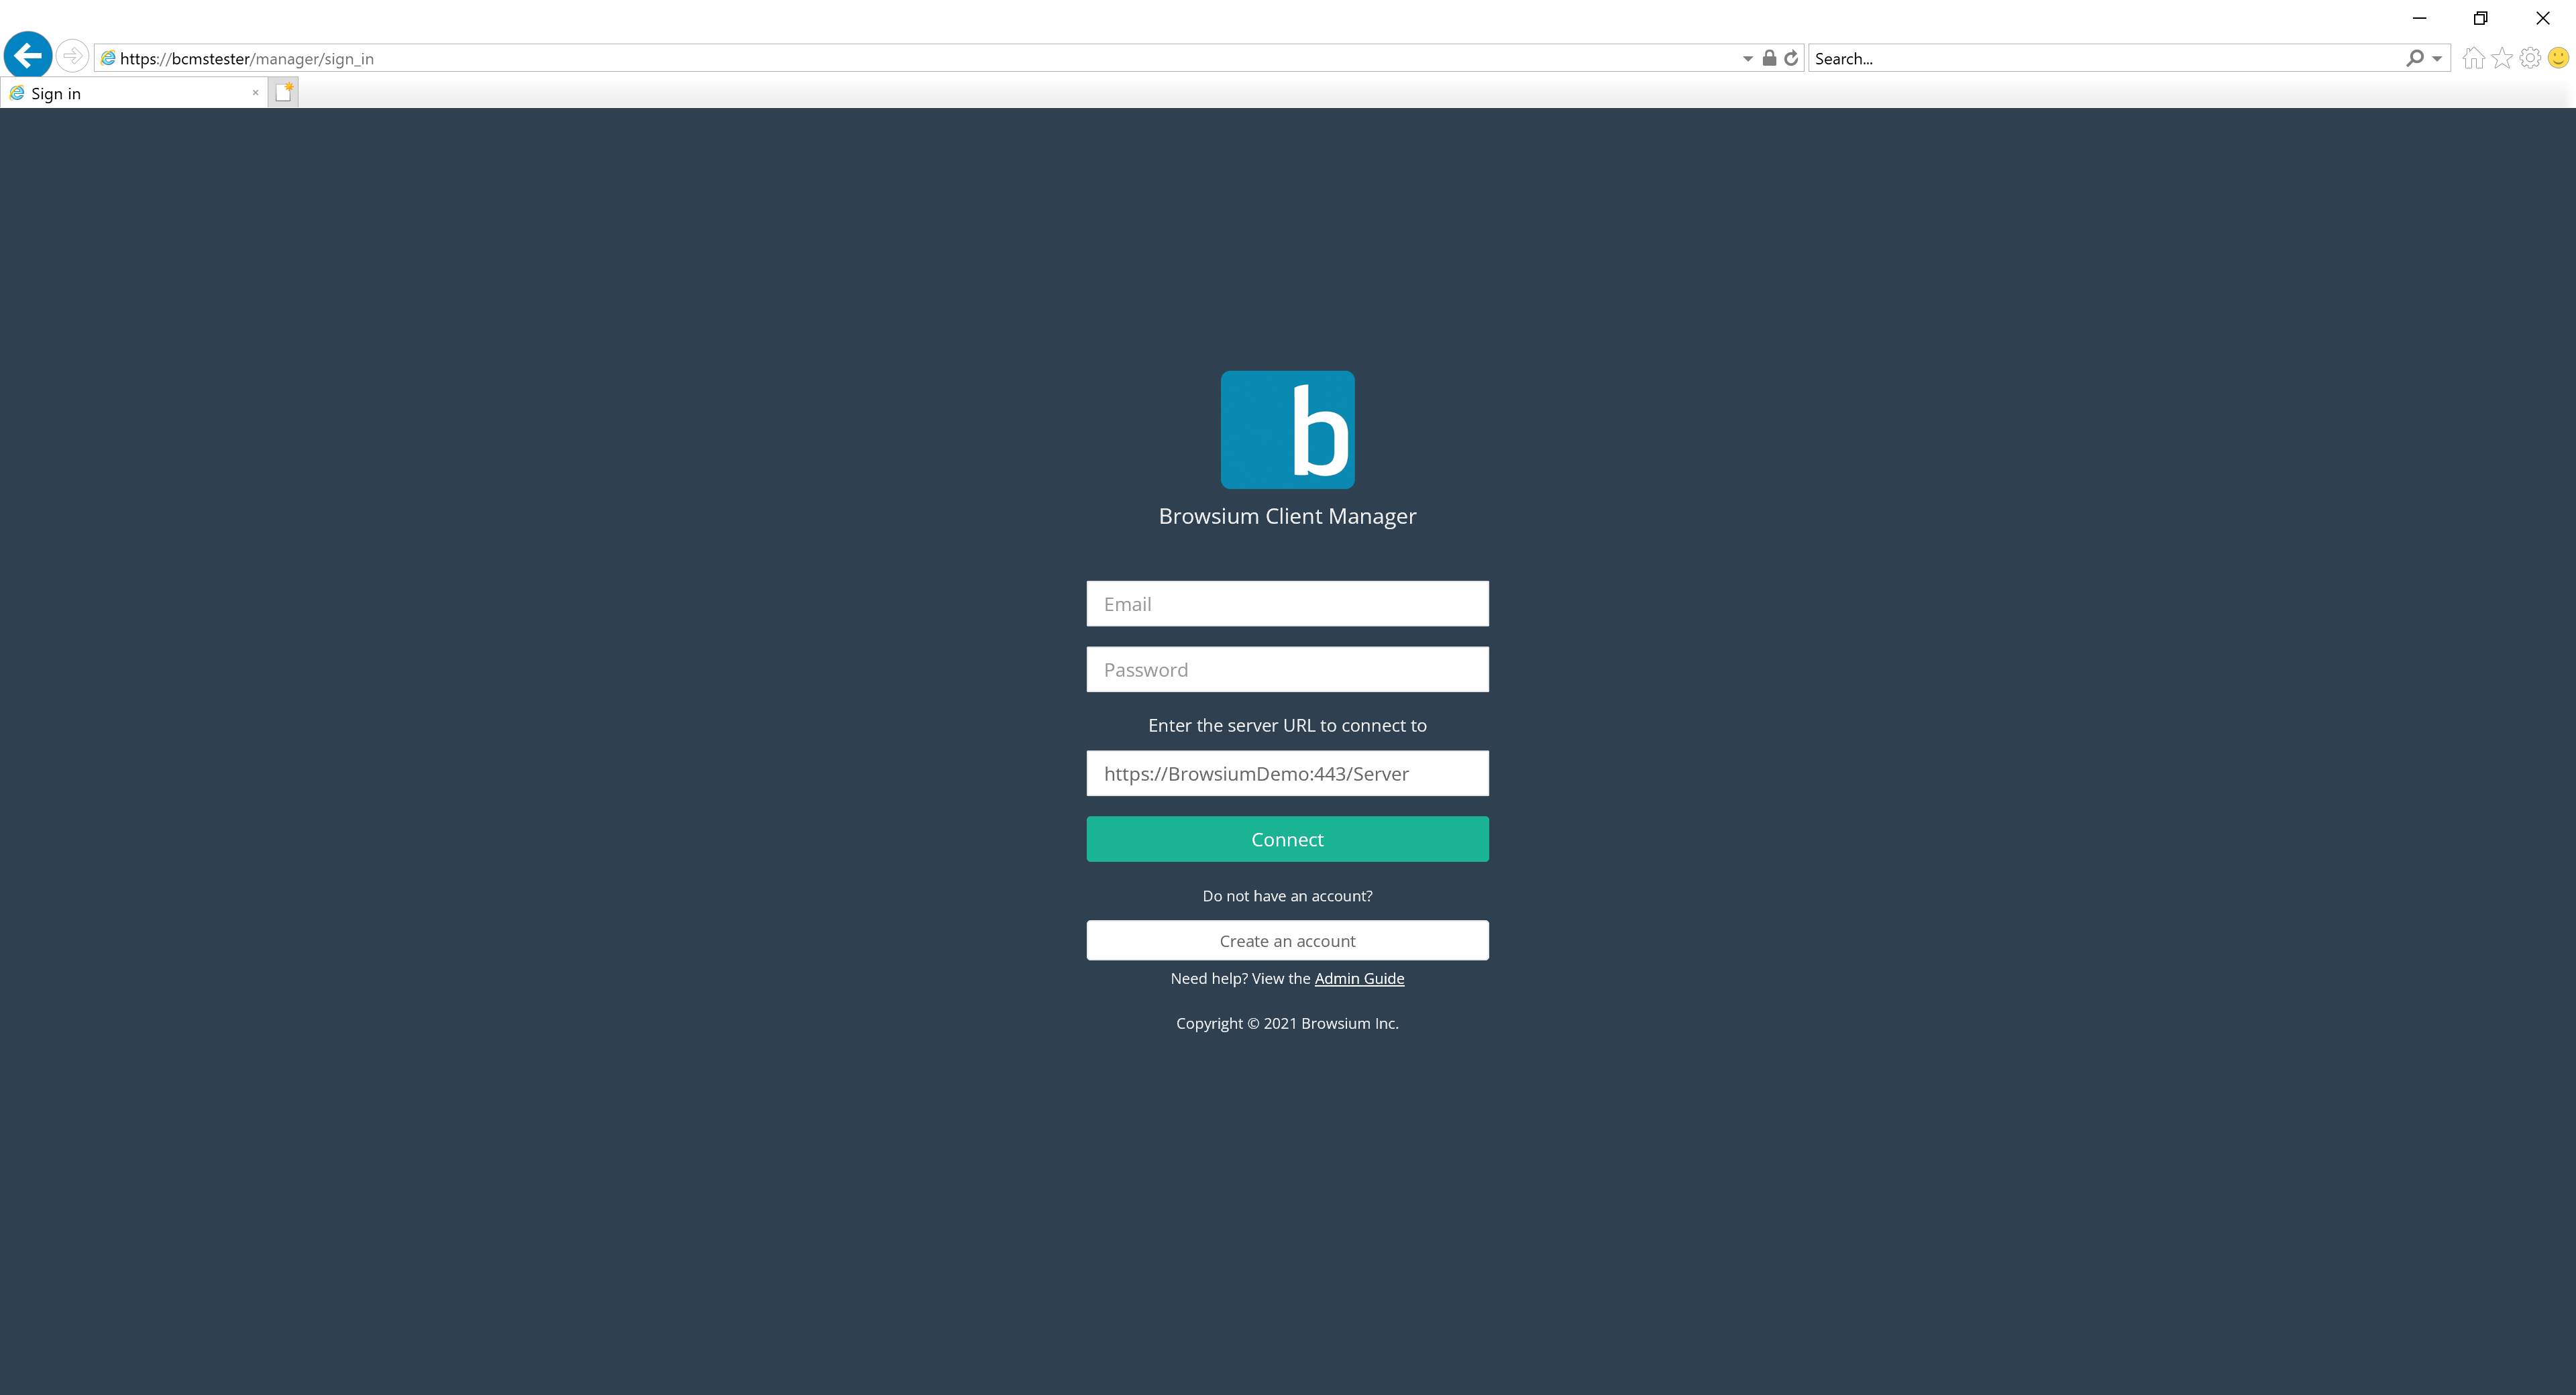
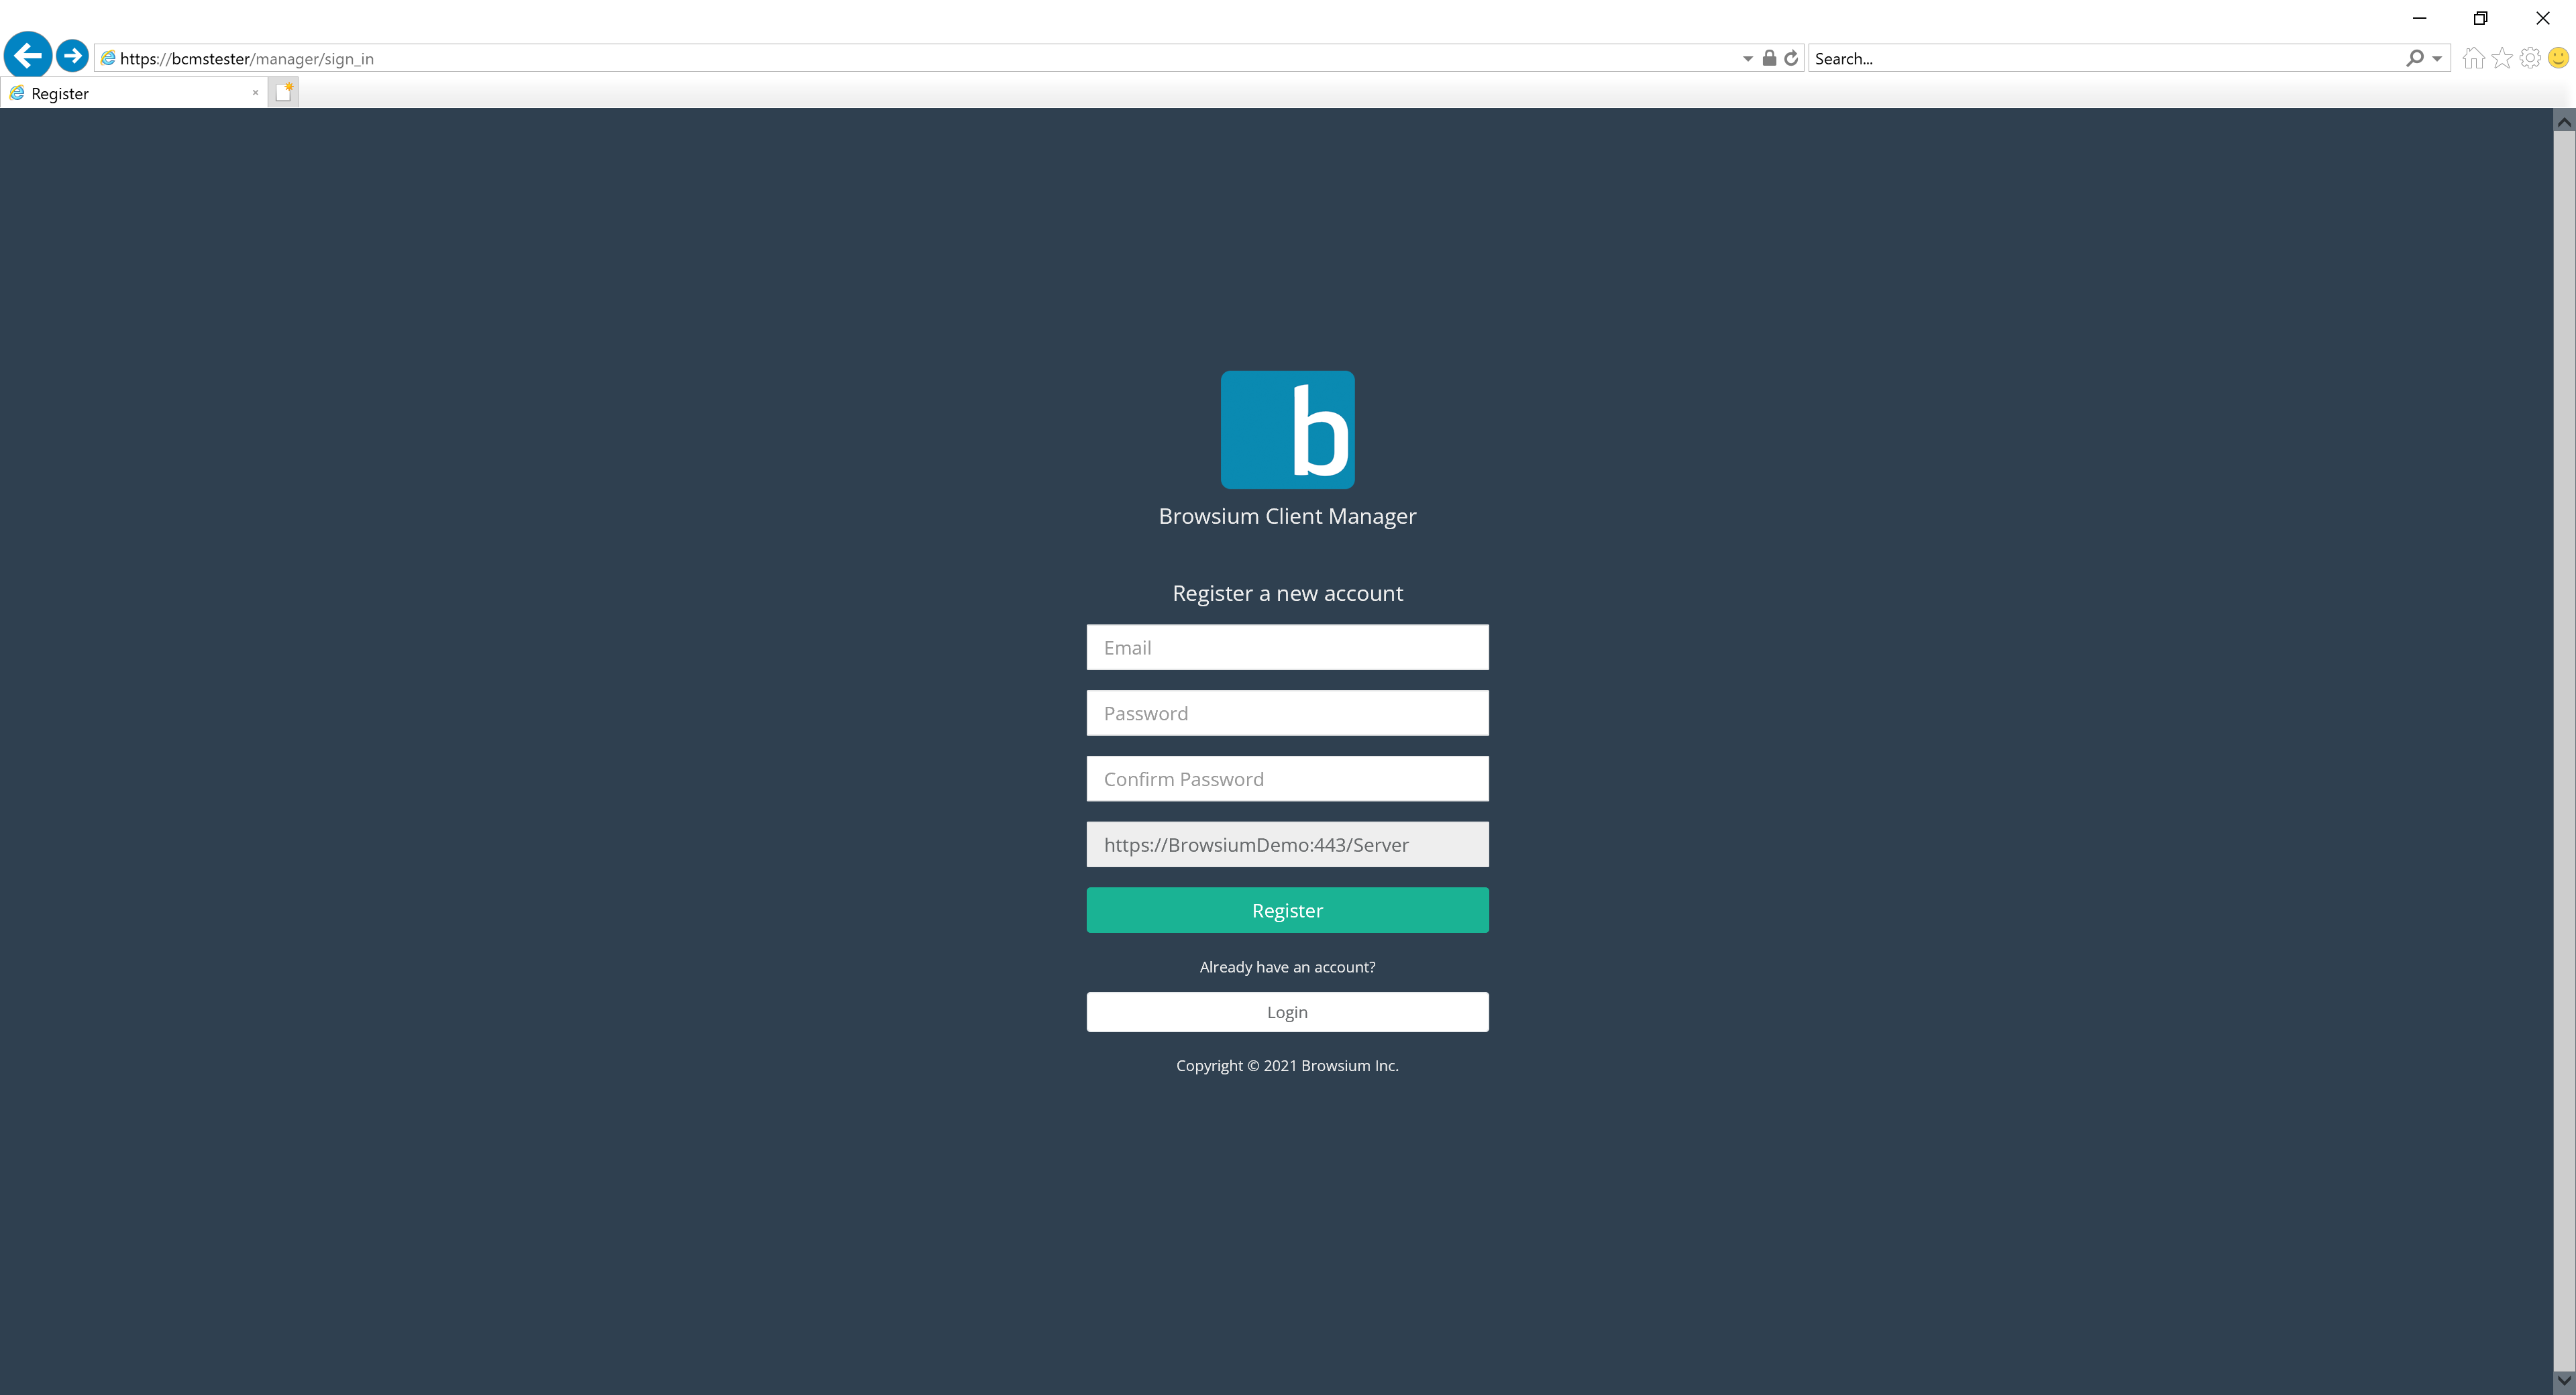
Section titled “Creating the First Account”Once connected to BCMS Manager, user accounts are required for access control. There are three types of accounts available: Administrator, Power User, and Standard User. The first account created will be an Administrator. Select the ‘Create an account’ button the first time you access BCMS Manager.
Browsium Client Manager accounts are stored in Proton database but local and SSO authentication is supported. See Section 2.4 for more information on SSO configuration.
 {width=“2.501487314085739in” height=“3.6644094488188976in”}
Then create a username and password, using a well-formed email address for the username and a strong password. Then select Register.
 {width=“2.065923009623797in” height=“3.350713035870516in”}
The default BCMS password policy enforces a minimum of 8 characters, including 1 special character. Supported special characters are
] [ ? / < ~ # ` ! @ $ % ^ & * ( ) + = } | : ” ; ’ , > {
To change the defaults and enforce stricter password policies, including account lockout and password expiration, see Password Policy Management in the Users Page section.
Once your account is created, you’ll be able to log in directly with the credentials you created.
 {width=“2.3496981627296587in” height=“2.425845363079615in”}
Activating BCMS
Section titled “Activating BCMS”BCMS is setup by default as Inactive. This is done to conserve resources as many customers pre-deploy and stage systems prior to formal rollout. BCMS is setup to help with that from the start. If your organization isn’t ready to roll out, the systems will be dormant until the right time.
Activating BCMS is simple. Navigate to the Diagnostics section in the left-hand navigation pane. In the top section of the page, you will see the System Control section:
{width=“5.310317147856518in” height=“3.062509842519685in”}
Simply click the Activate button and the system is online and ready to respond to clients.
This page also includes information for the ongoing health of the BCMS Server which will be useful for troubleshooting and verifying system performance over time.
Adding licenses
Section titled “Adding licenses”The BCMS installation process offers the ability to add licenses, but some customers choose to add them later. Or perhaps your organization has recently purchased a new product and wants to activate. Adding licenses to BCMS is quick and easy — then all Browsium Clients will be activated and ready to go quickly.
Since the Browsium Client is a single installer — meaning all products are included in the client installation - no additional deployments or client setup is needed beyond adding a license key to BCMS in order to activate additional products.
To add licenses, navigate to the Licenses page using the left-hand navigation in BCMS Manager and select the ‘Add License Key’ button.
{width=“4.629291338582677in” height=“2.5213812335958004in”}
That will bring up the license entry dialog box.
{width=“3.6457053805774278in” height=“1.8955818022747157in”}
Enter the license key provided by Browsium and click OK. That’s it. BCMS will now authorize clients as they connect, and the Clients page will show the status.
Deploying client registration token
Section titled “Deploying client registration token”The client registration token should be deployed using the client registration token file. This file can be downloaded by clicking ‘Get client registration token file’ from the Client registration page.
The client registration token should be deployed to clients before the client is installed to ensure fast registration upon install and initial launch. The registration token should be deployed to C:\ProgramData\Browsium\Proton\client_registration_token.json. Upon startup, the client will convert the client registration token to an encrypted file located in the same directory.
Client registration tokens can also be set as part of interactive install in the client configuration section. Copy and paste the client registration token value located on the client registration page into the client registration token field in the client’s client configuration section to configure this way.
 {width=“0.9in” height=“0.9in”}
Appendix A
Appendix A: Troubleshooting
In this section you will learn:
-
How to recognize Issues with a BCMS system
-
What to do when BCMS is not working as expected