Configuration Tutorial
Once the Browsium Catalyst Configuration Manager and Browsium Client installation is complete, you can begin configuring which sites to load in the desired browser. The Browsium Catalyst Configuration Manager is provided as a simple tool to create and manage the rules and settings that govern Catalyst behavior. Its output is a Catalyst project (or configuration), which instructs the Catalyst service within Browsium Client to act based on the Rules defined.
It’s critical to enable Browsium Client extensions within Internet Explorer, Edge, Chrome, and Firefox before proceeding with this tutorial. If the Browsium Client was installed using default settings, then all extensions will be enabled. If the default option was not selected ensure the manual process is followed. Read section 5.2 - Managing Browsium Client Extensions to learn how to manually deploy Browsium Client throughout your enterprise and centrally enable the extensions.
Client PCs must have Browsium Client installed, with all extensions enabled, to test or use the configurations created in the Catalyst Configuration Manager.
Windows 8 and later do not allow any program to set the default browser. If you’re testing or running this tutorial on Windows 8 and later, be sure to read section 5.3 - Readying Windows 8 and later for Catalyst. This section will also provide guidance for deploying Catalyst throughout an enterprise running Windows 8 and later, as steps must be taken to configure Catalyst as the default browser on every PC.
[]{#_How_to_create .anchor}
Create and Test a Project
Section titled “Create and Test a Project”Catalyst offers a few ways to deliver powerful options for rule matching in order to meet the specific needs of your environment. In this tutorial, we will create a new project, add a rule, and then test the configuration by simulating a client deployment. We’ll do all of this on a single system running both Catalyst Configuration Manager and Browsium Client.
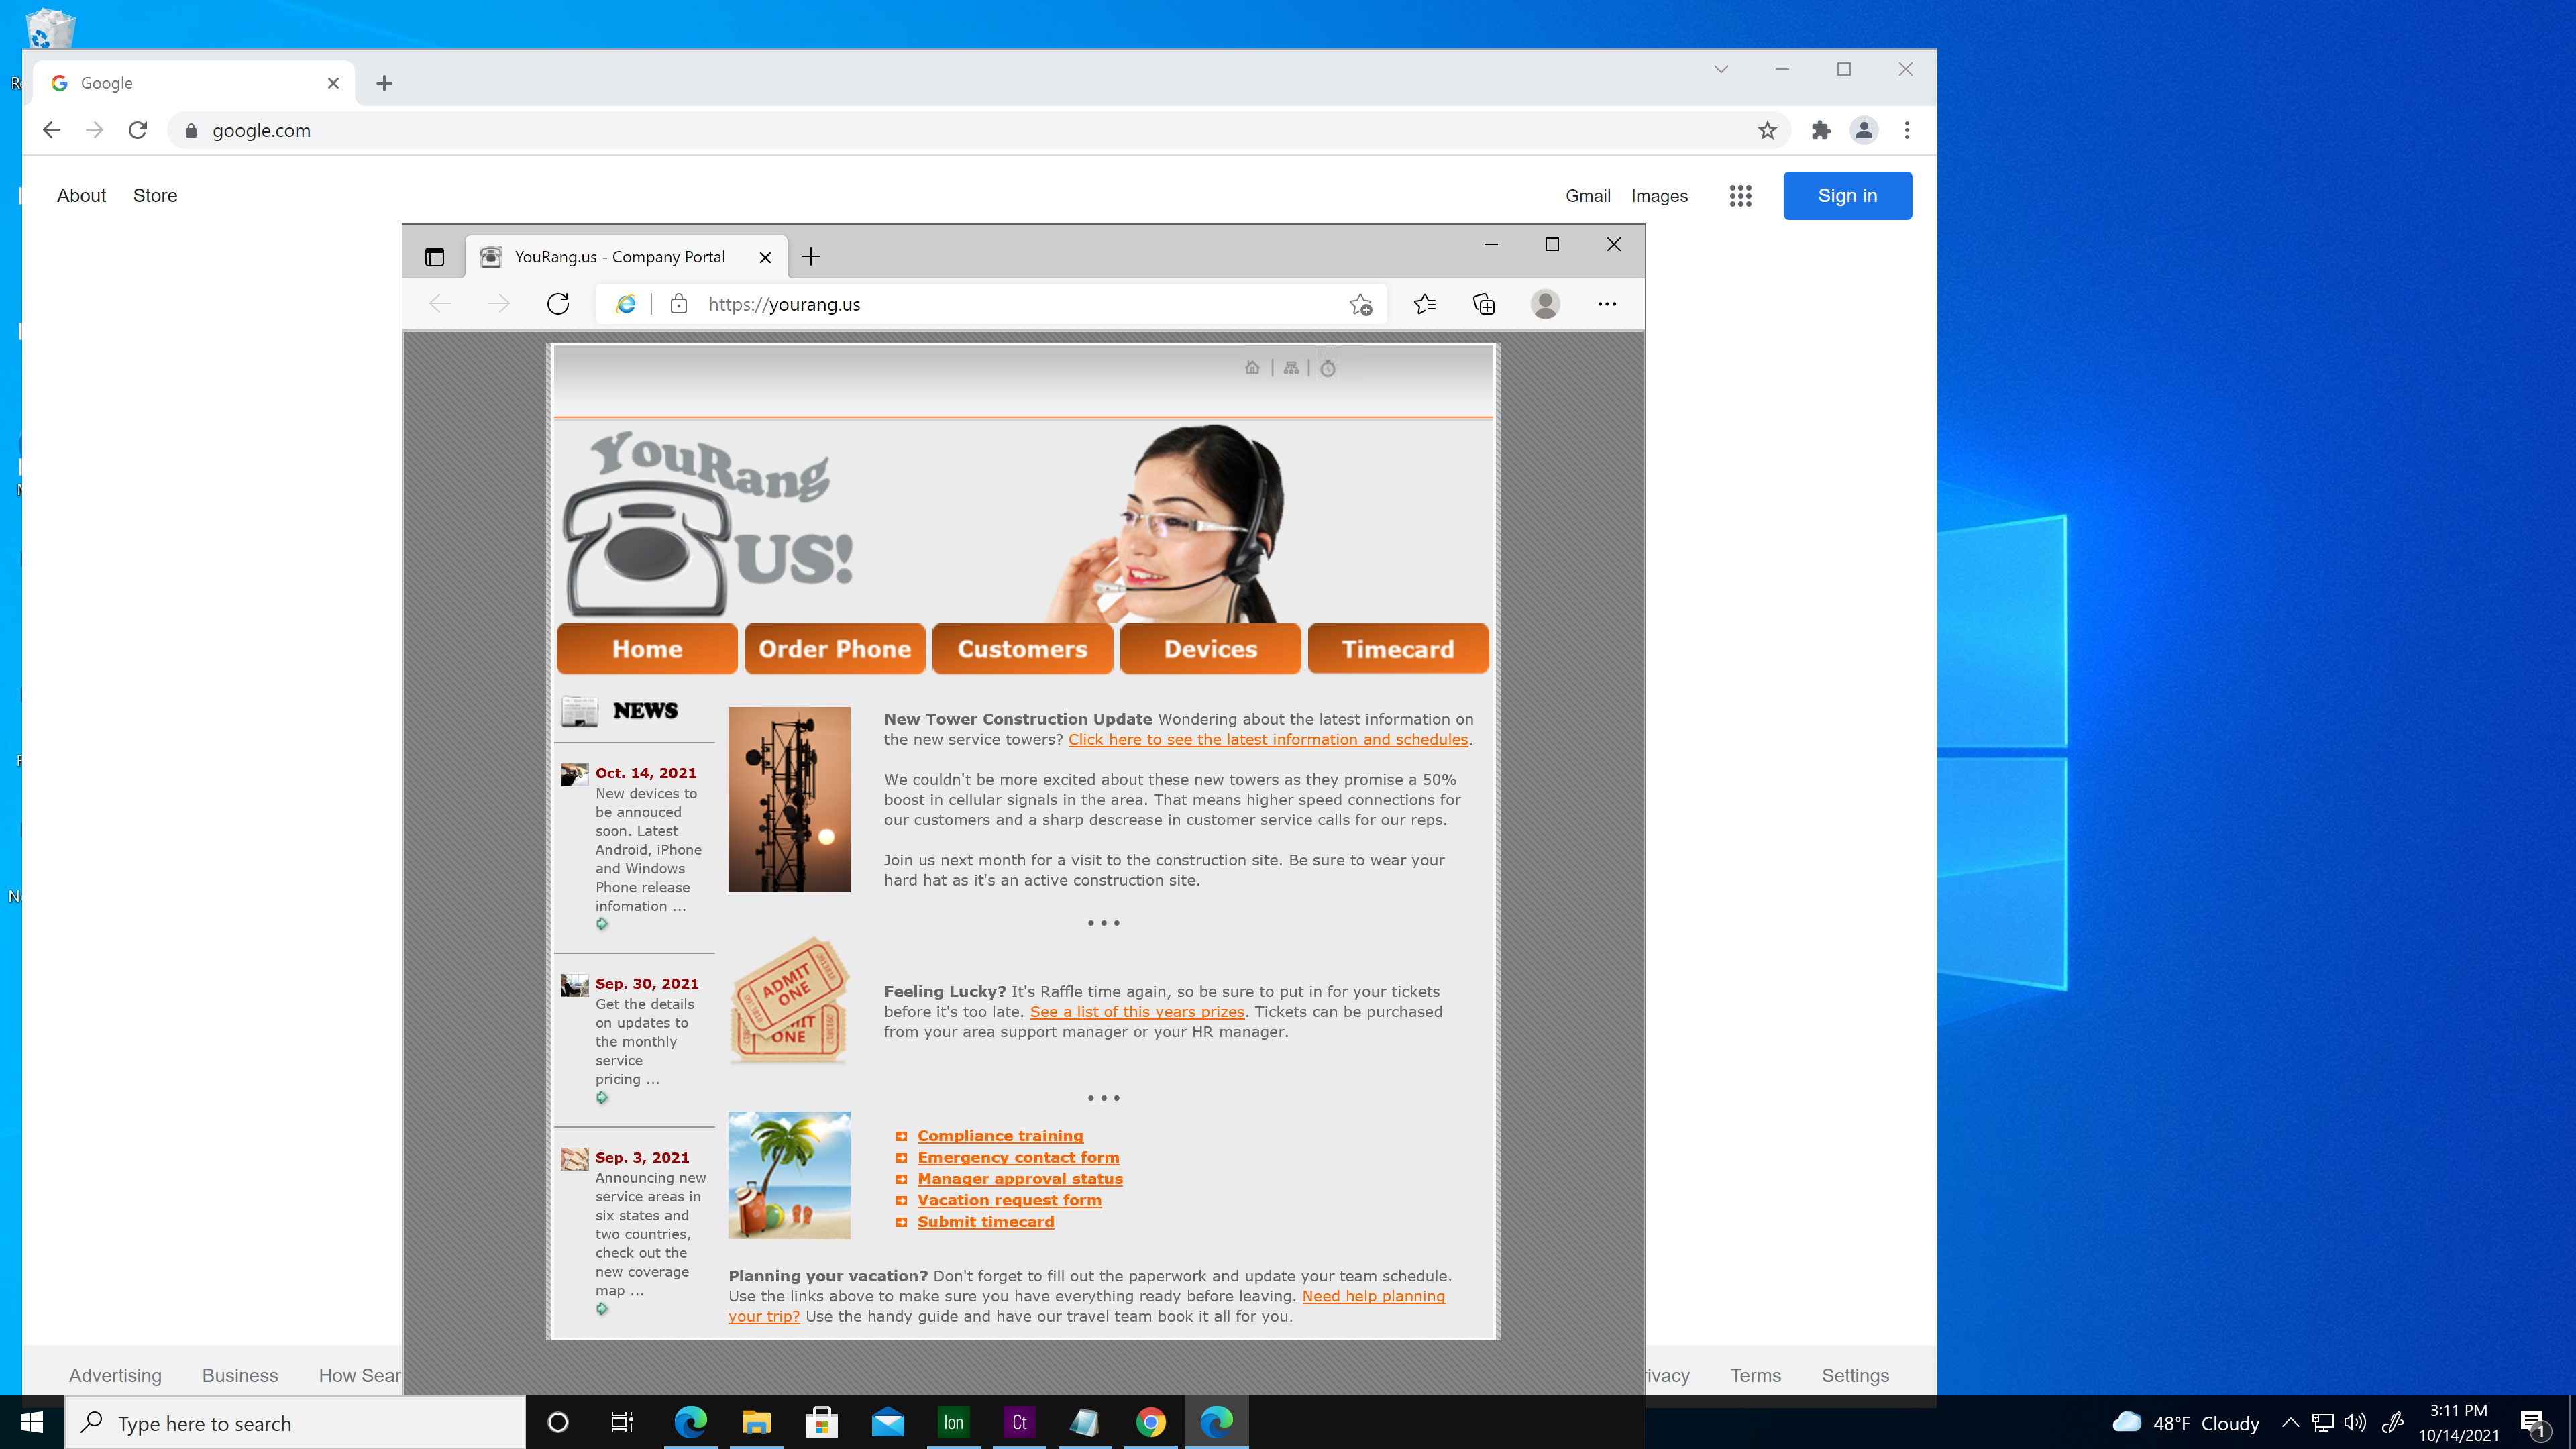
For this example, we have identified a website, www.yourang.us, which must be opened using Edge Internet Explorer Mode— it will not work properly in any other browser.
To create the rules needed for the YouRang site, use the following steps:
-
Open Catalyst Configuration Manager. A new project is created by default. There are a variety of ways to open existing project files, but this section assumes this is your first time creating a Catalyst project. Therefore, we’ll have you start building your configuration from an empty, new project.
-
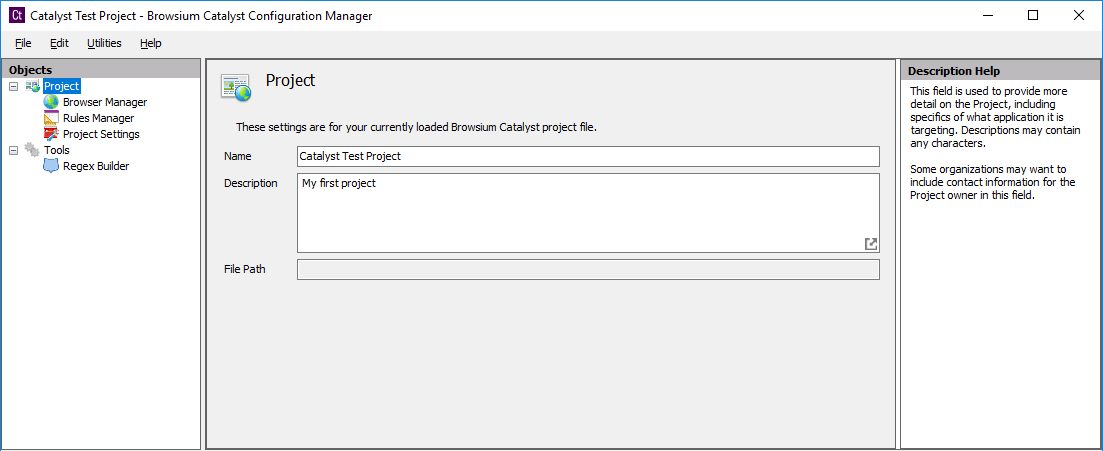
Begin by naming your project “Catalyst test project” with description “My first project”.
 {width=“5.090277777777778in” height=“2.0822462817147858in”}
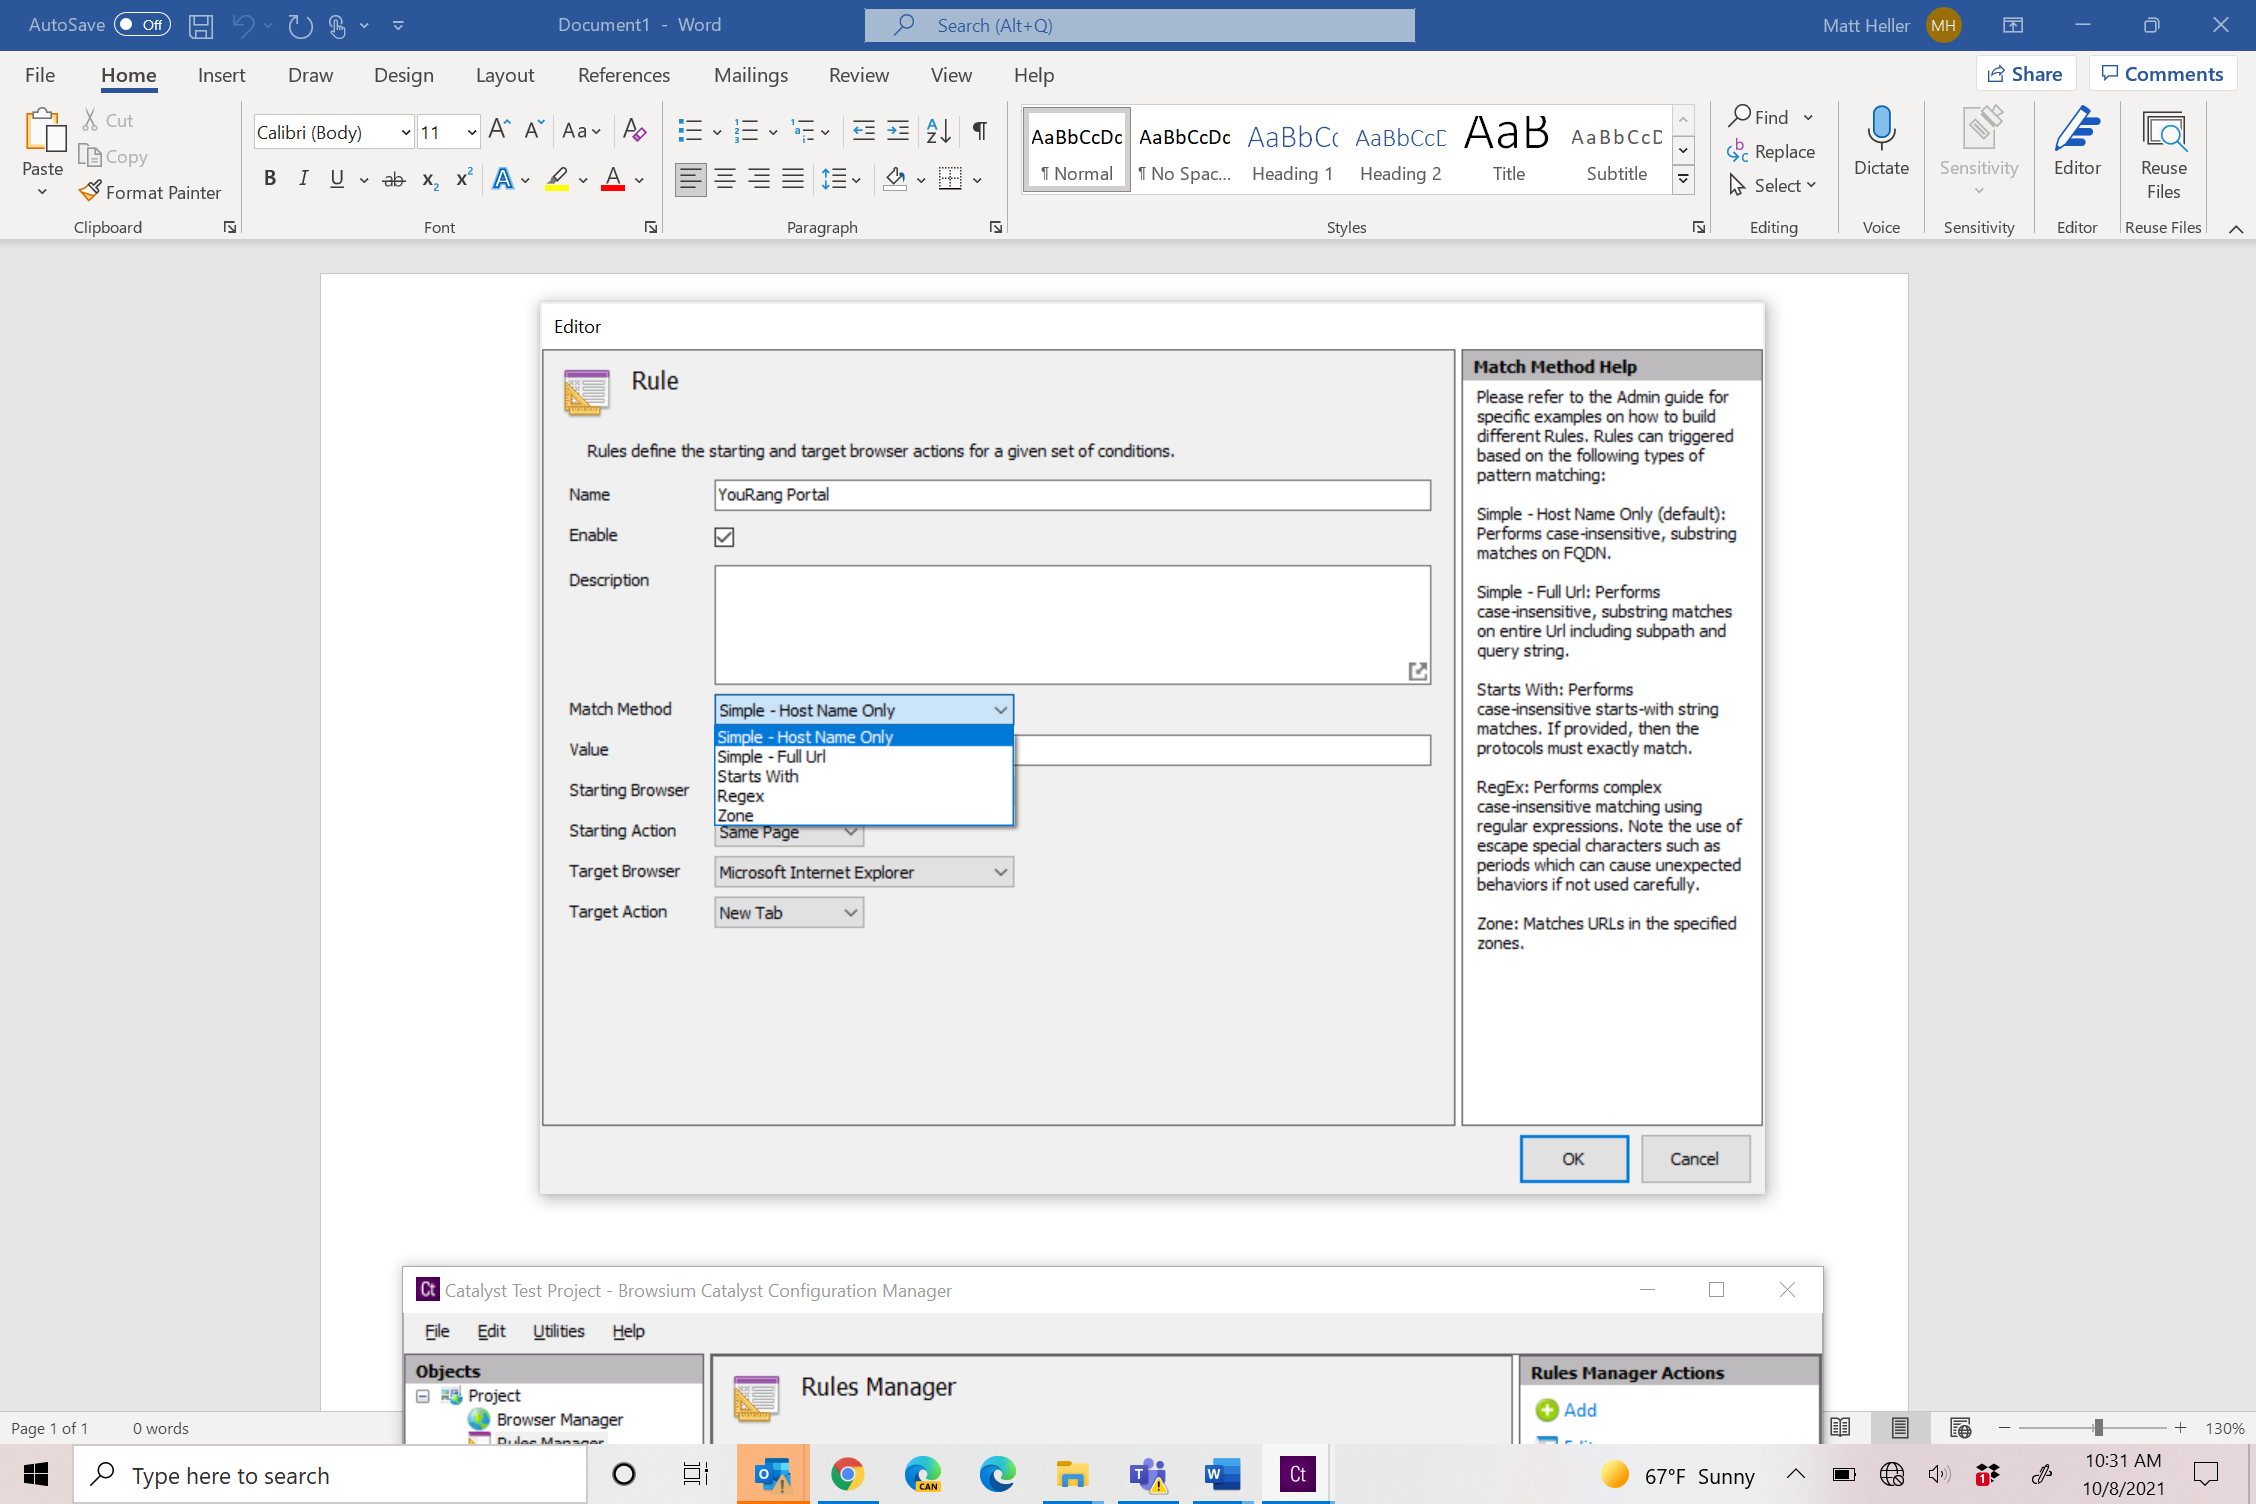
Click the Rules Manager, click the ‘Add Rule’ link in the Actions pane to bring up the Rule Editor screen. Start by entering a name for the rule. Rule names are friendly names for organizational and identification purposes only and have no effect on the behavior of a rule. For this example, we will choose “YouRang Portal”.
 {width=“4.4453794838145235in” height=“3.2371489501312336in”}
-
Keep the Enable checkbox selected to ensure the rule is active and Catalyst will trigger when the proper conditions are met.
-
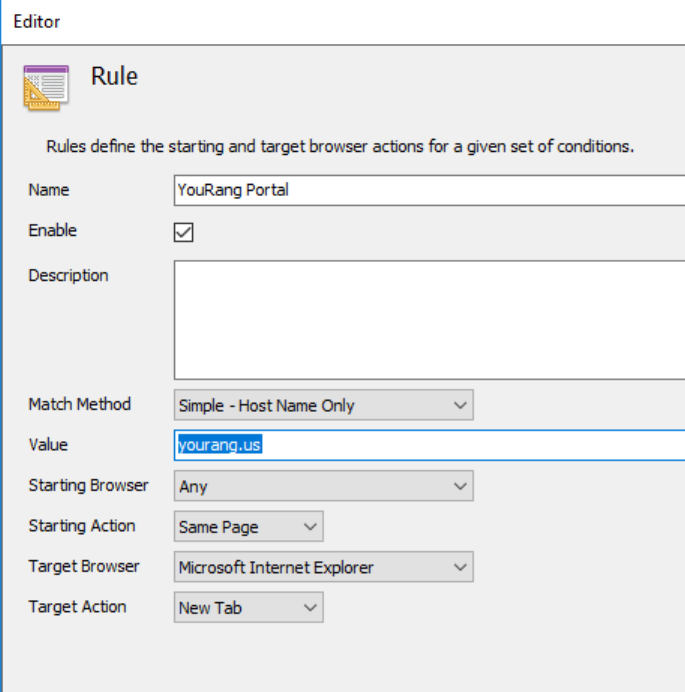
Select a Match Method from the dropdown menu. There are five Match Method options for ensuring the rule is triggered when desired conditions are met. The Simple — Host Name Only method does a simple string match of the FQDN against the text in the Value field. The Simple — Full Url method does a simple string match of the Url against the text in the Value field. The RegEx method is provided for scenarios that require a set of complex matching criteria. Zone will match the Internet Explorer Zone of the target website. Most rules will only need either the Simple — Host Name Only or Simple — Full Url methods. For this example, we will leave everything set to the default (Simple — Host Name Only).
 {width=“3.0534689413823273in” height=“3.0536865704286966in”}
- Enter a Value to check for rule matching conditions. For this example, we will use “yourang.us” to match our portal site.
 {width=“3.1593350831146108in” height=“3.191738845144357in”}
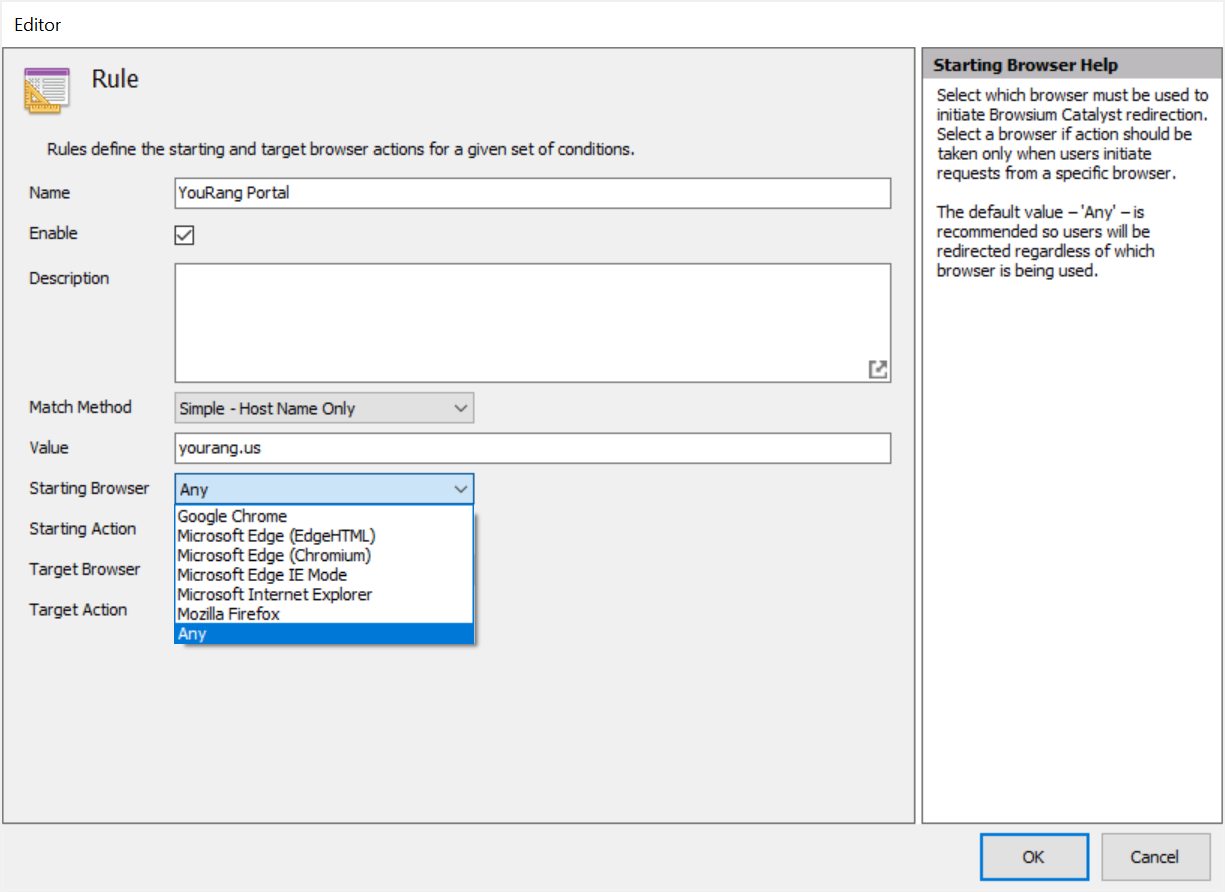
- The ‘Starting Browser’ option allows administrators to define if the user must initiate a rule action from a specific browser, or if the rule should be triggered regardless of which browser is active at the time. The default value for this setting is ‘ANY’ to ensure the broadest rule coverage.
 {width=“4.231563867016623in” height=“3.081446850393701in”}
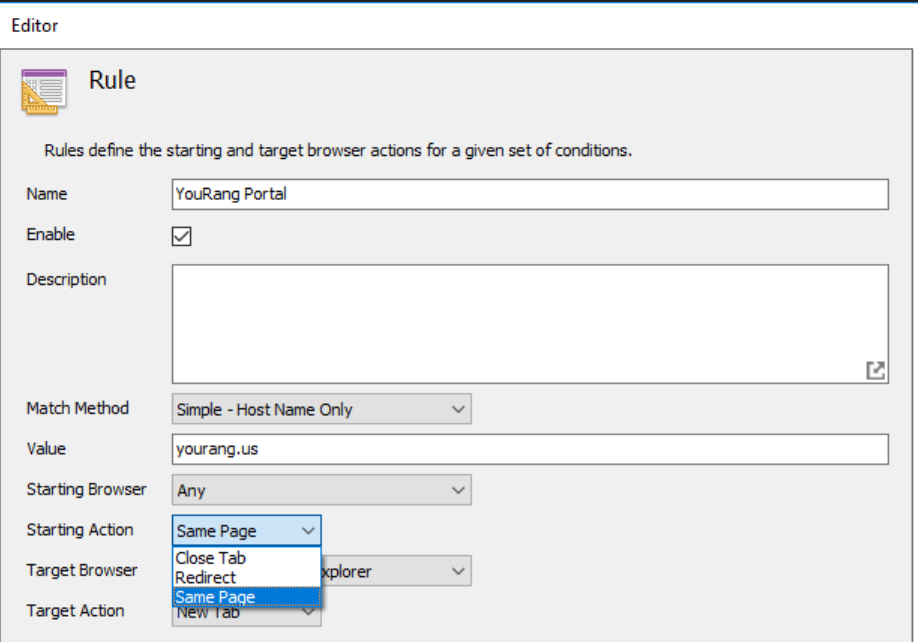
- Catalyst provides the ability for administrators to control the user experience behavior when a rule is triggered. Administrators can set Catalyst to leave the user on the same page, redirect them (and display a redirection notice page) or close the active tab. By default, the ‘Starting Action’ option is set to ‘Same Page’ to avoid interrupting the user activity and simply leaving the user at their last successful navigation.
 {width=“3.5561143919510063in” height=“2.4870013123359582in”}
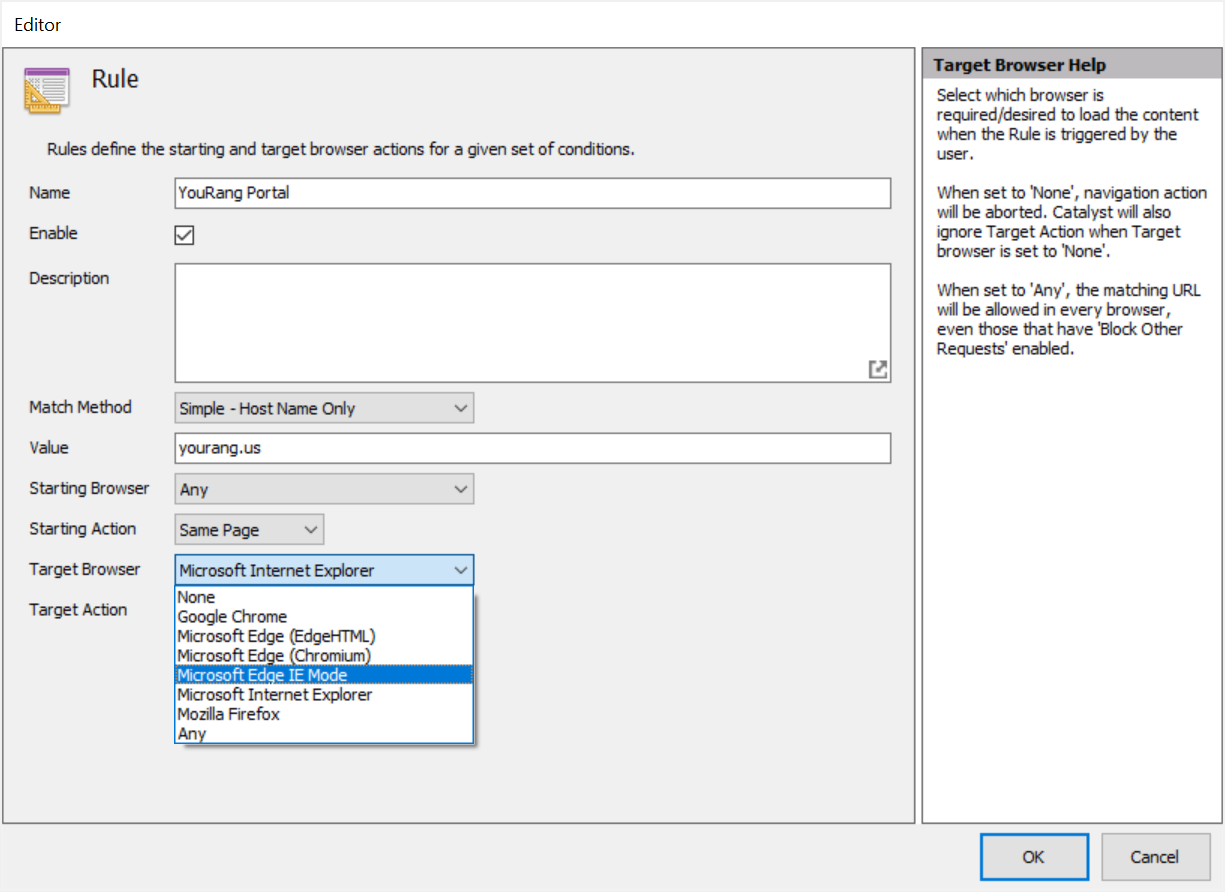
- The ‘Target Browser’ setting defines which browser is loaded when the rule conditions are met. By default, this value is set to the Default Browser value listed in the Project Settings node — in this case ‘Edge IE Mode’. Administrators should set this value to the desired browser. If the purpose of the rule is to block navigation (e.g. for security purposes), simply set the value to ‘NONE’. For this example, we will load the YouRang portal in Edge Internet Explorer Mode.
 {width=“3.7280129046369206in” height=“2.7147583114610674in”}
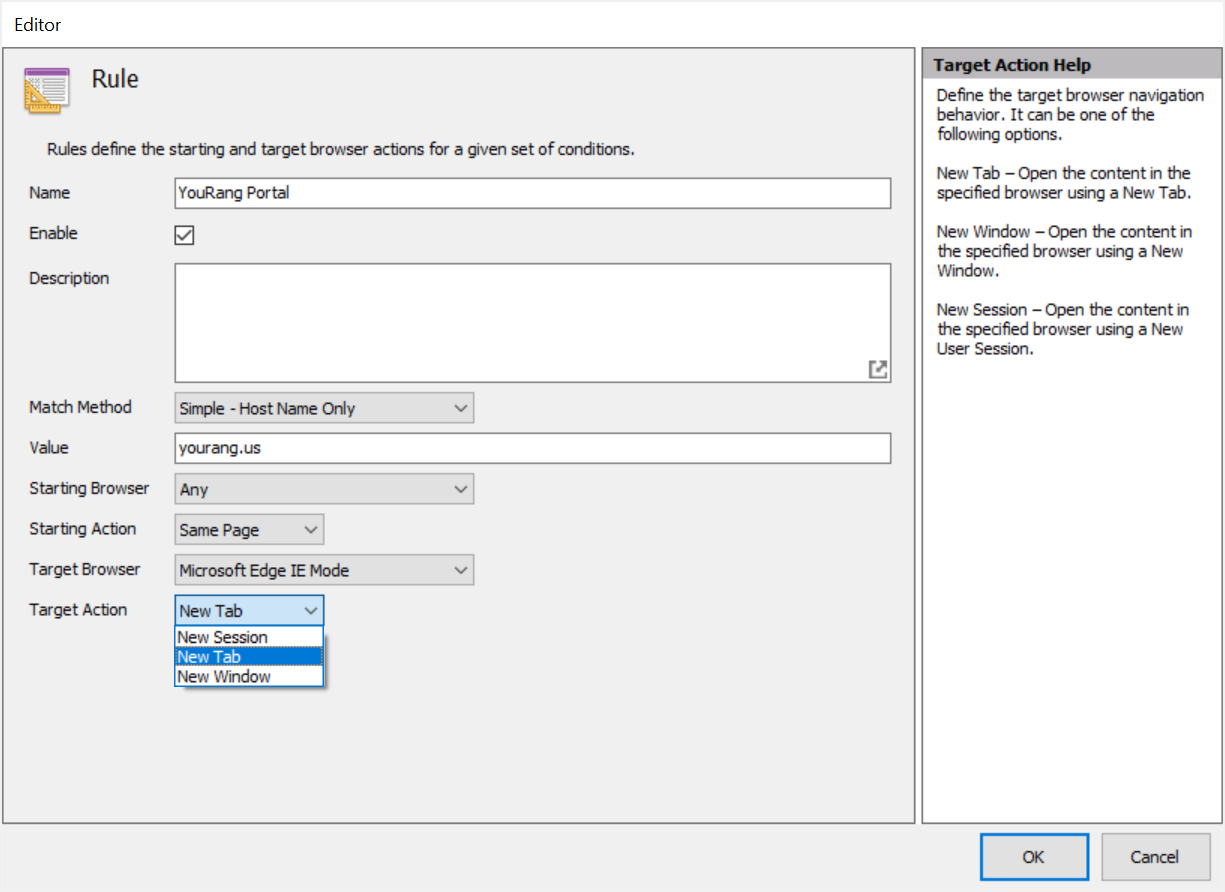
- The final rule option is Target Action. Catalyst offers the ability to granularly control browser behaviors when loading content, offering the ability to load sites in a new tab, new window or new session. By default, the ‘Target Action’ value is set to ‘New tab’. For this example, we’ll stay with the default ‘New tab’.
 {width=“3.4743711723534556in” height=“2.5300546806649167in”}
Depending on the type of Browser, some of the actions not applicable to those browsers won’t be visible. Microsoft Edge (Legacy) only supports only New Tab action. Microsoft Internet Explorer and Microsoft Edge (Chromium) are the only browsers supporting the New Session action.
- When you are done creating the rule, click OK to save the rule to the Rules Manager.
 {width=“4.8468930446194225in” height=“2.0091819772528434in”}
-
For our Catalyst test project, we don’t need to modify any browsers in the Browser Manager or the Project Settings. We will leave everything at its default value.
-
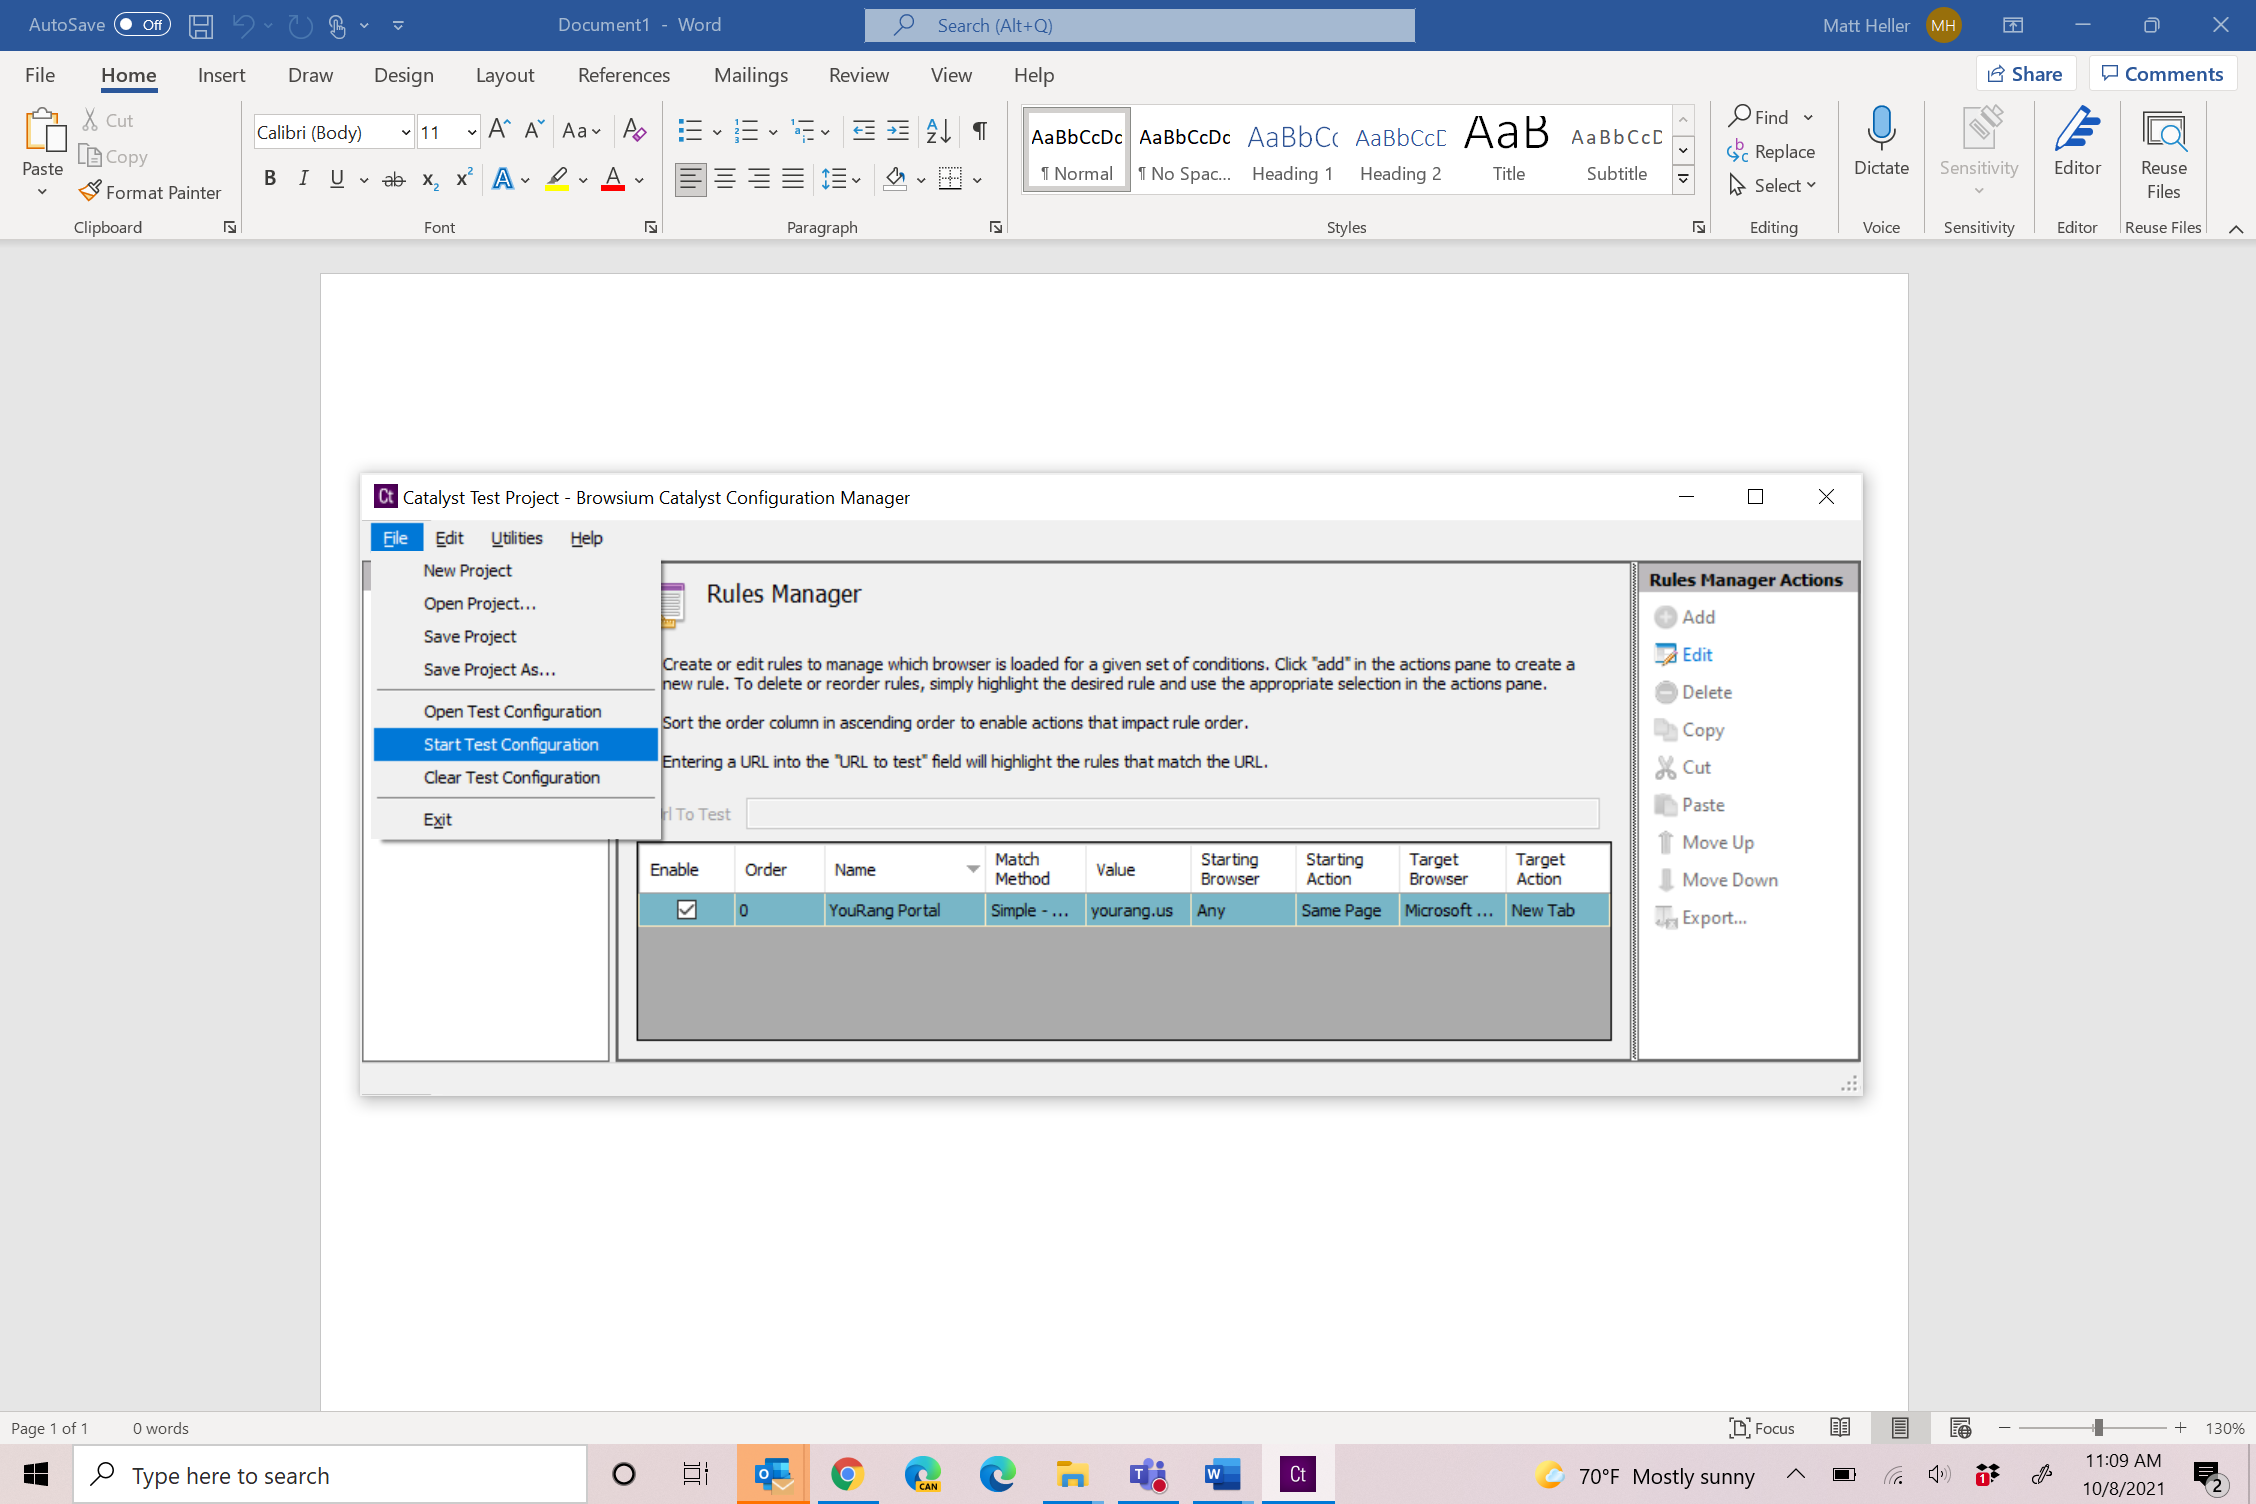
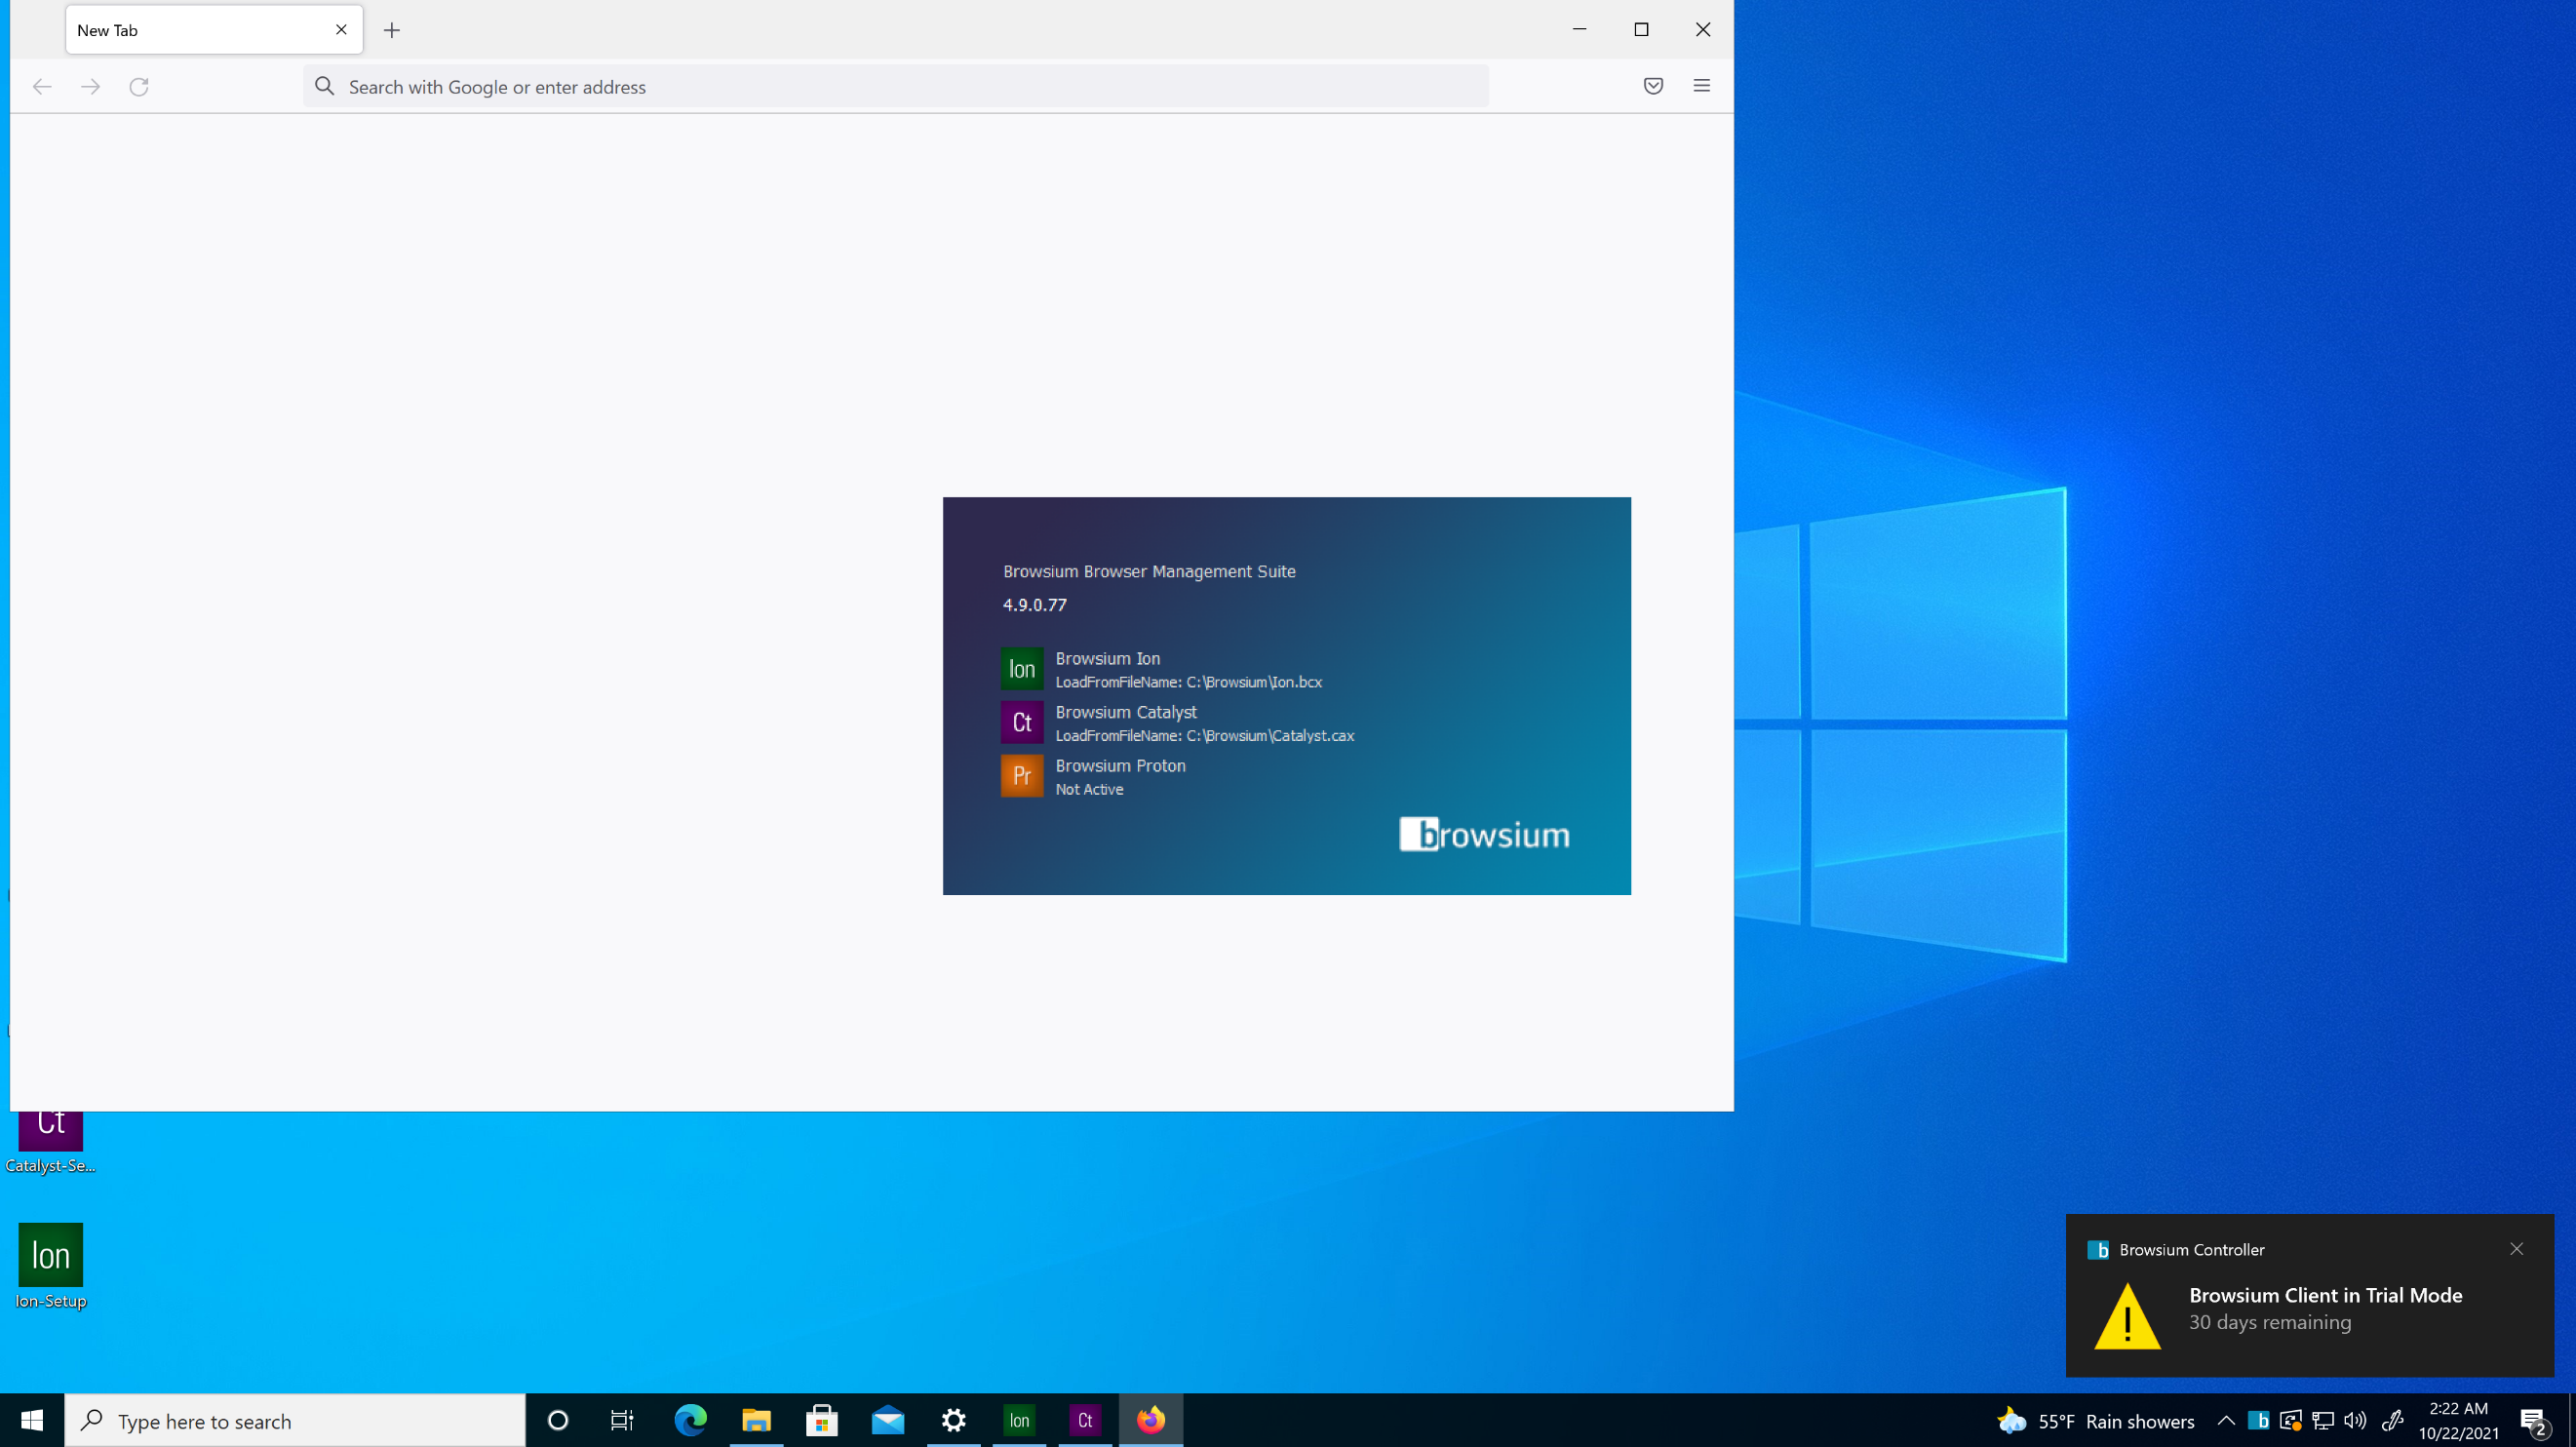
Now we’re ready to test our configuration. Using the ‘Start Test Configuration’ menu option will prompt you to save the project file and then immediately and automatically apply project file pointers directly in the system registry and start Browsium Controller to process the new configuration.
 {width=“1.3954636920384953in” height=“1.6707239720034996in”}
Projects should be saved regularly to ensure work is not accidently lost. Catalyst Configuration Manager does not auto-save work in progress, other than when Start Test Configuration is executed.
Once Start Test Configuration has been executed, Browsium Controller will display the Browsium Splash Screen to inform you that the Controller has started. Note that this occurs even though our configuration has the Show Splash Screen on Start setting disabled (as it is by default). This is because Catalyst Configuration Manager will always override this setting when it starts the Controller during project development. If you have configured Ion or Proton, you’ll see these entries here as well.
 {width=“4.247916666666667in” height=“2.495833333333333in”}
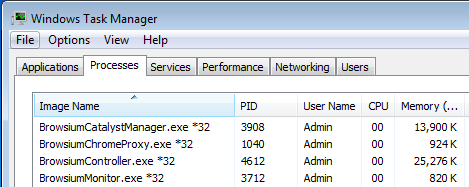
- After the test configuration has been started, you may want to confirm that the Browsium Client processes are all running by viewing them in the Task Manager. The key processes are BrowsiumController.exe and BrowsiumMonitor.exe. Those will only run when the Controller is running with a valid Catalyst configuration (or a valid Proton or Ion configuration, as all three modules share a single Browsium Controller).
BrowsiumChromeProxy.exe is part of Browsium Client Extension for Chrome and always runs when Browsium Client is installed. BrowsiumCatalystManager.exe is the Catalyst Configuration Manager and only runs when the Manager application is running during project development and testing.
 {width=“3.661639326334208in” height=“1.4599704724409448in”}
- Now that we’ve confirmed all process are running correctly, it’s time to test the configuration in our browser. Simply open Chrome (or Firefox) and enter the URL www.yourang.us in the address bar. Catalyst will automatically stop the navigation in Chrome and open an Edge IE Mode window in Microsoft Edge to the YouRang site.
 {width=“5.718573928258968in” height=“2.470236220472441in”}
 {width=“1.222069116360455in” height=“1.222069116360455in”}
Section Five
Catalyst Deployment in the Enterprise
In this section you will learn:
-
How to use Group Policy to manage Browsium Client extension settings for each browser
-
To automatically enable and lock down Browsium Client extensions on remote systems
-
To configure other settings to improve the Browsium Client experience for end users